Chatorla Documentation
Everything you need to set up, configure, and make the most of your Chatorla account. Browse topics below or use the sidebar to navigate.
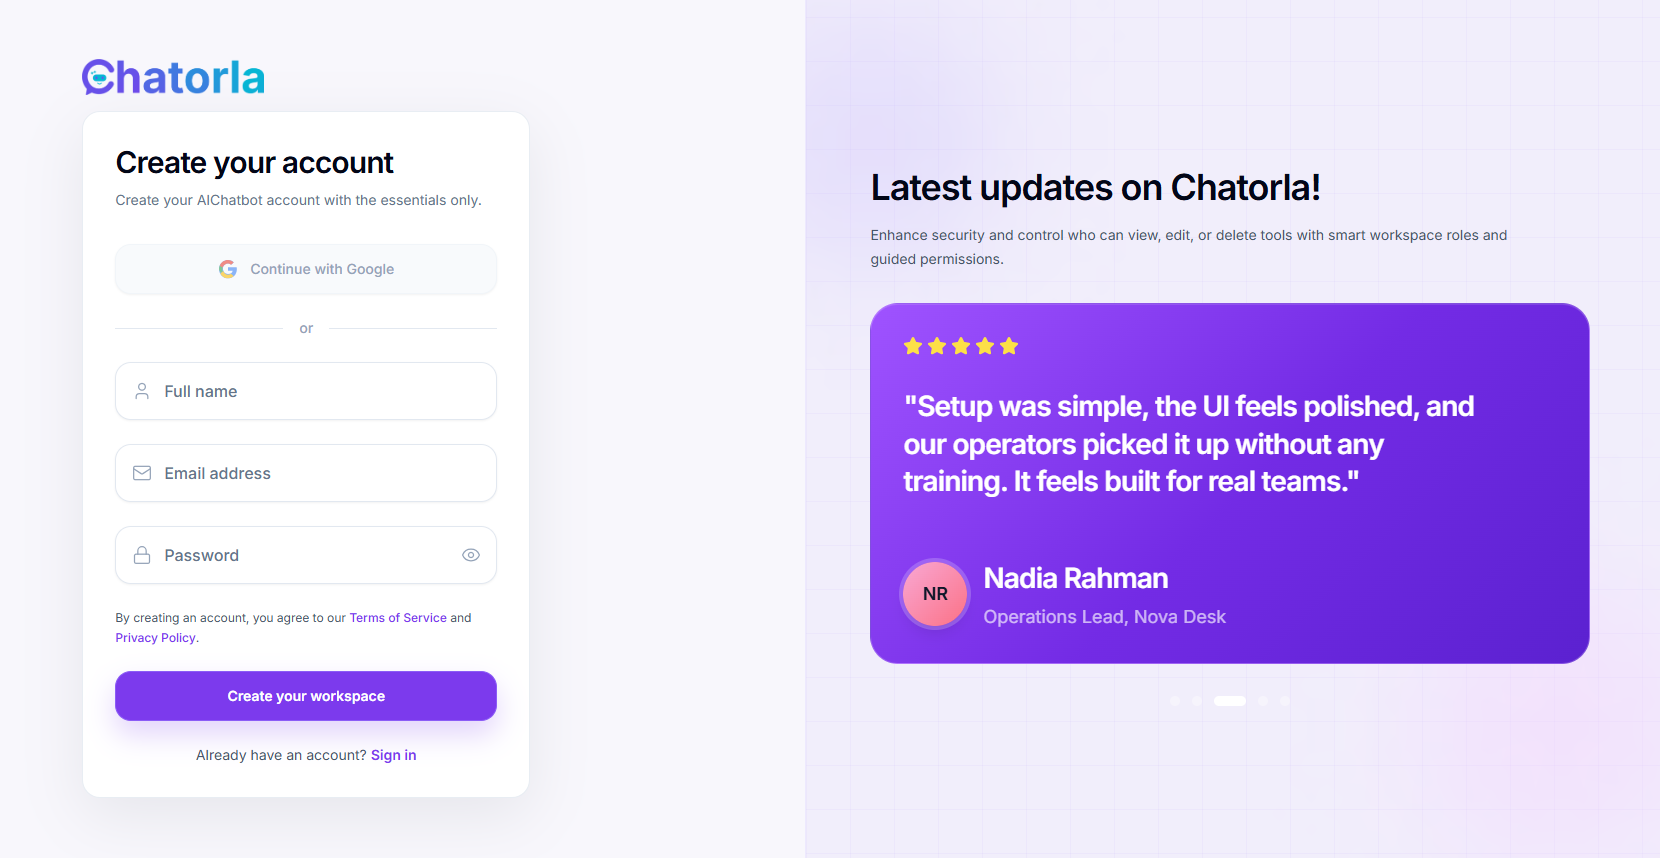
Sign Up Process
To create an account on Chatorla, follow these simple steps:
1. Visit the Registration Page
Go to https://app.chatorla.com/register
2. Choose Your Preferred Sign-Up Method
We offer two convenient ways to register:
- Standard Registration: Enter your name, email address, username, and password to create an account manually.
- Google Sign-Up: Quickly sign up using your Google account — no need to remember another password.
3. Enter Your Details
- First & Last Name – Used for your account profile.
- Email Address – This will be your login ID.
- Username – Used a unique user name.
- Password – Enter any password you want to use for your Chatorla account.
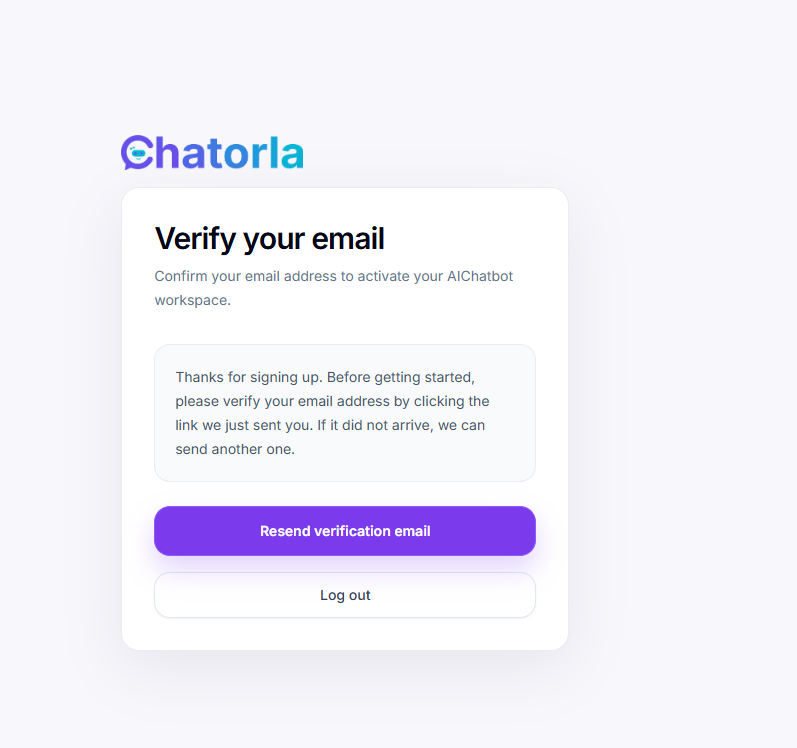
4. Verify Your Email
After signing up, an automatic verification email will be sent to the address you provided.
Check your inbox — look for an email from Chatorla.
Open the email and copy the verification code included in the message.
Return to the Chatorla website and paste the code into the verification field to activate your account.
Once verified, your account will be fully activated and ready to use.
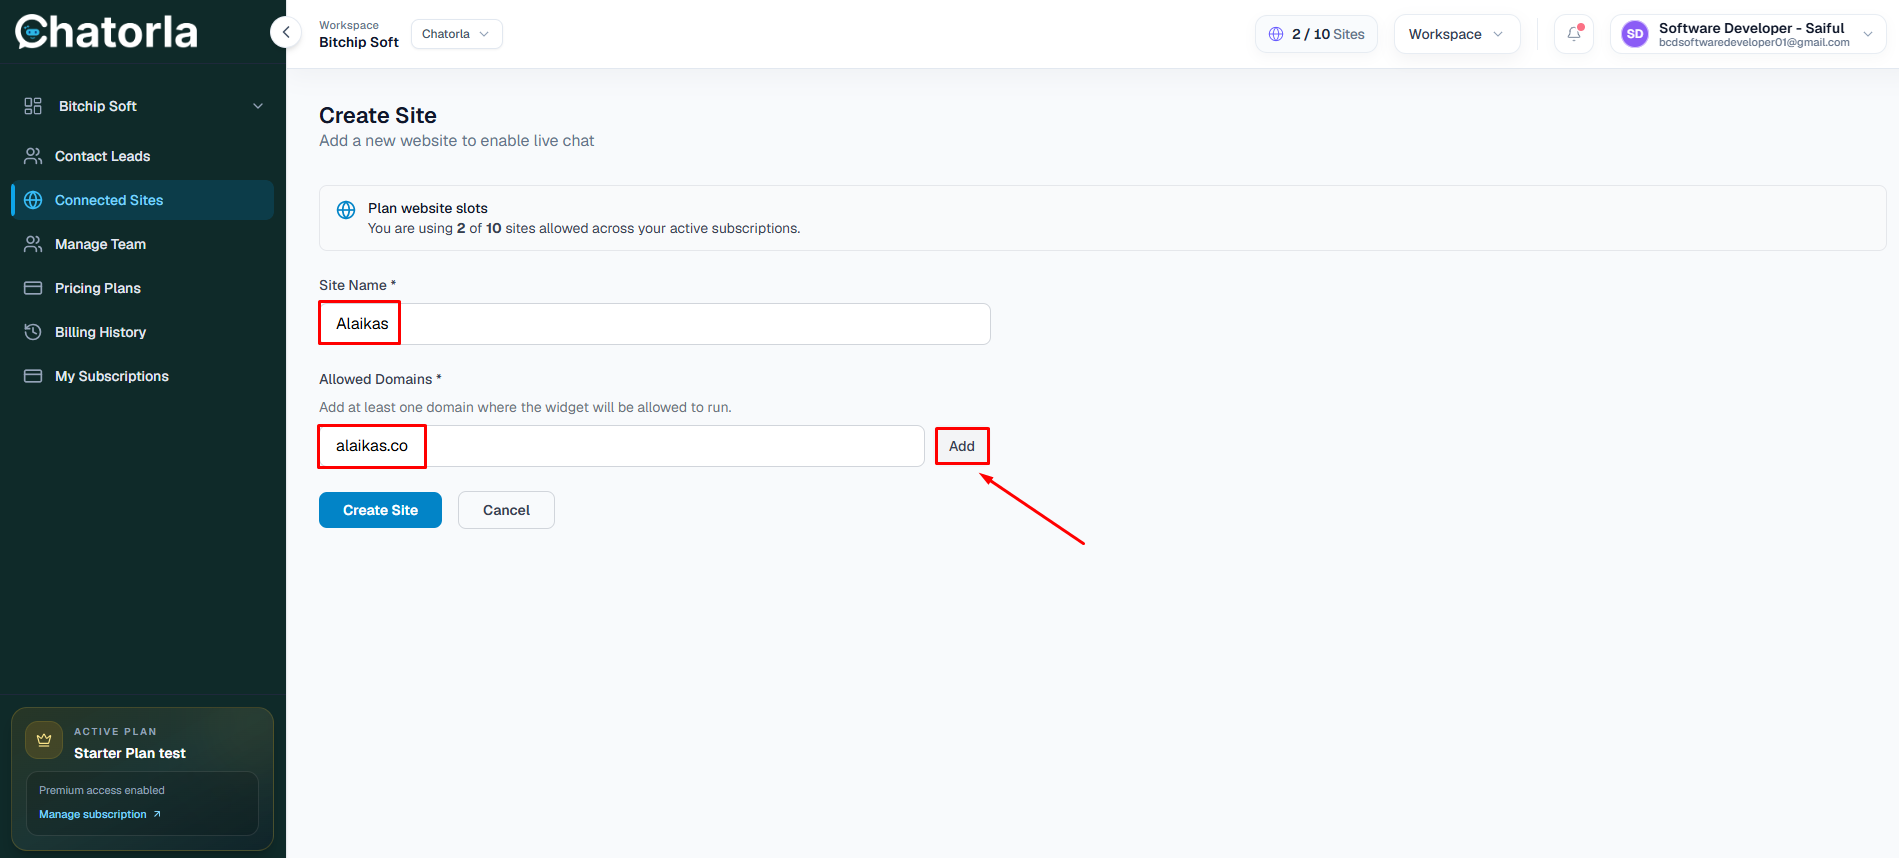
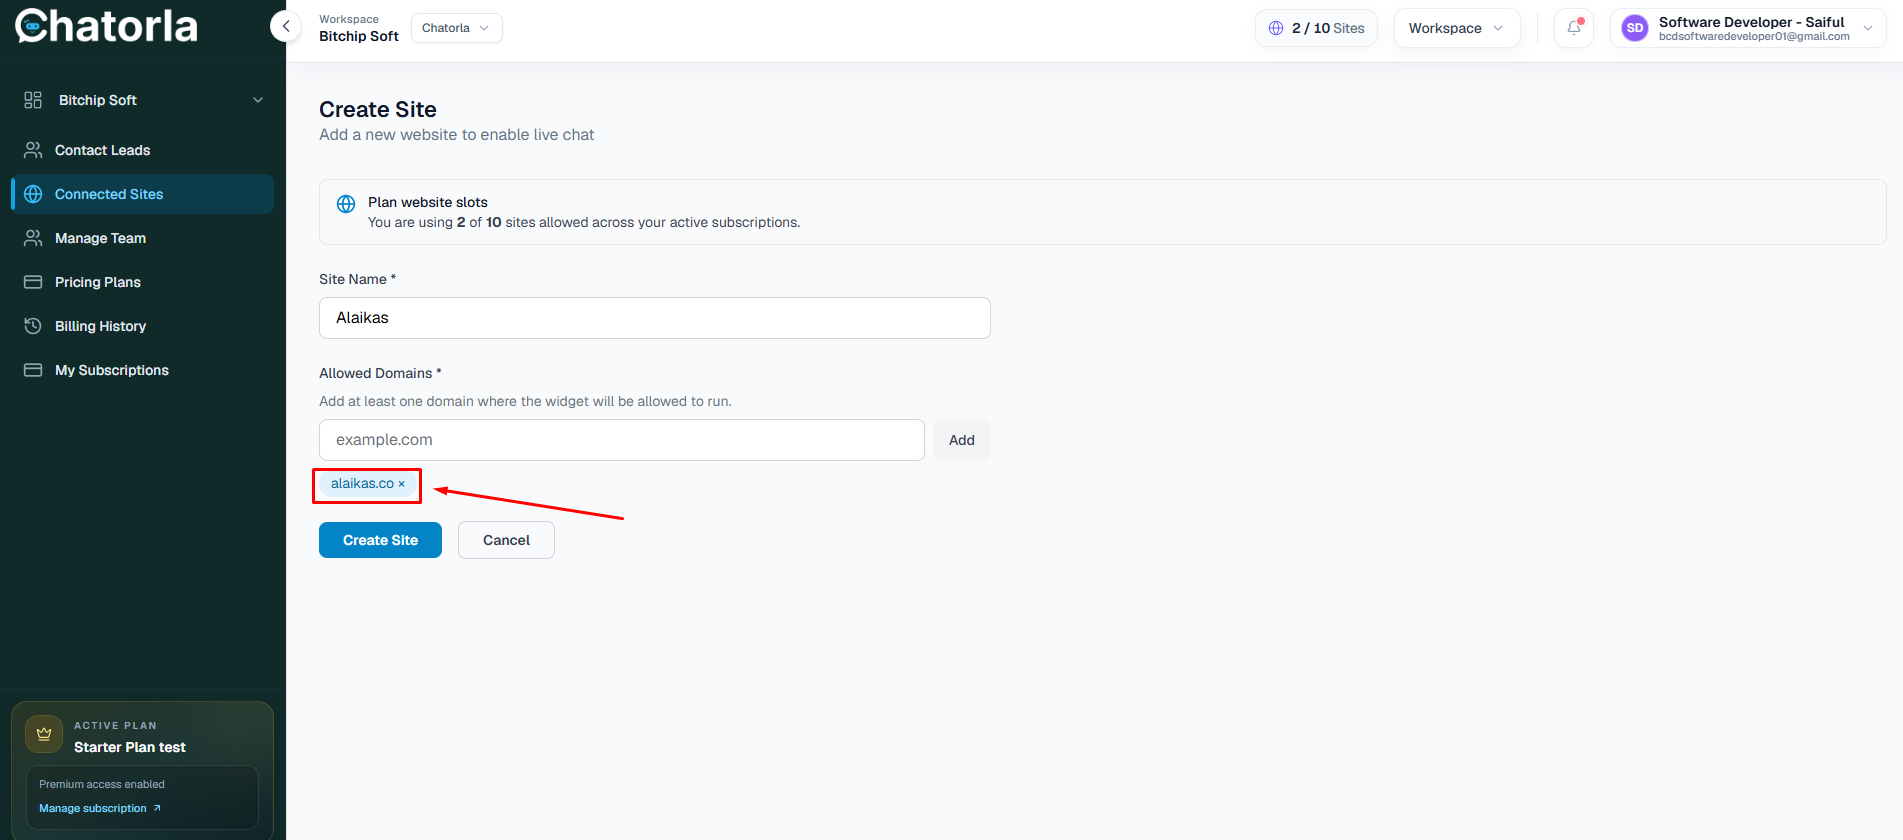
Connected Sites
The Connected Sites section lets you add and manage the websites where you want to install the Chatorla live chat widget.
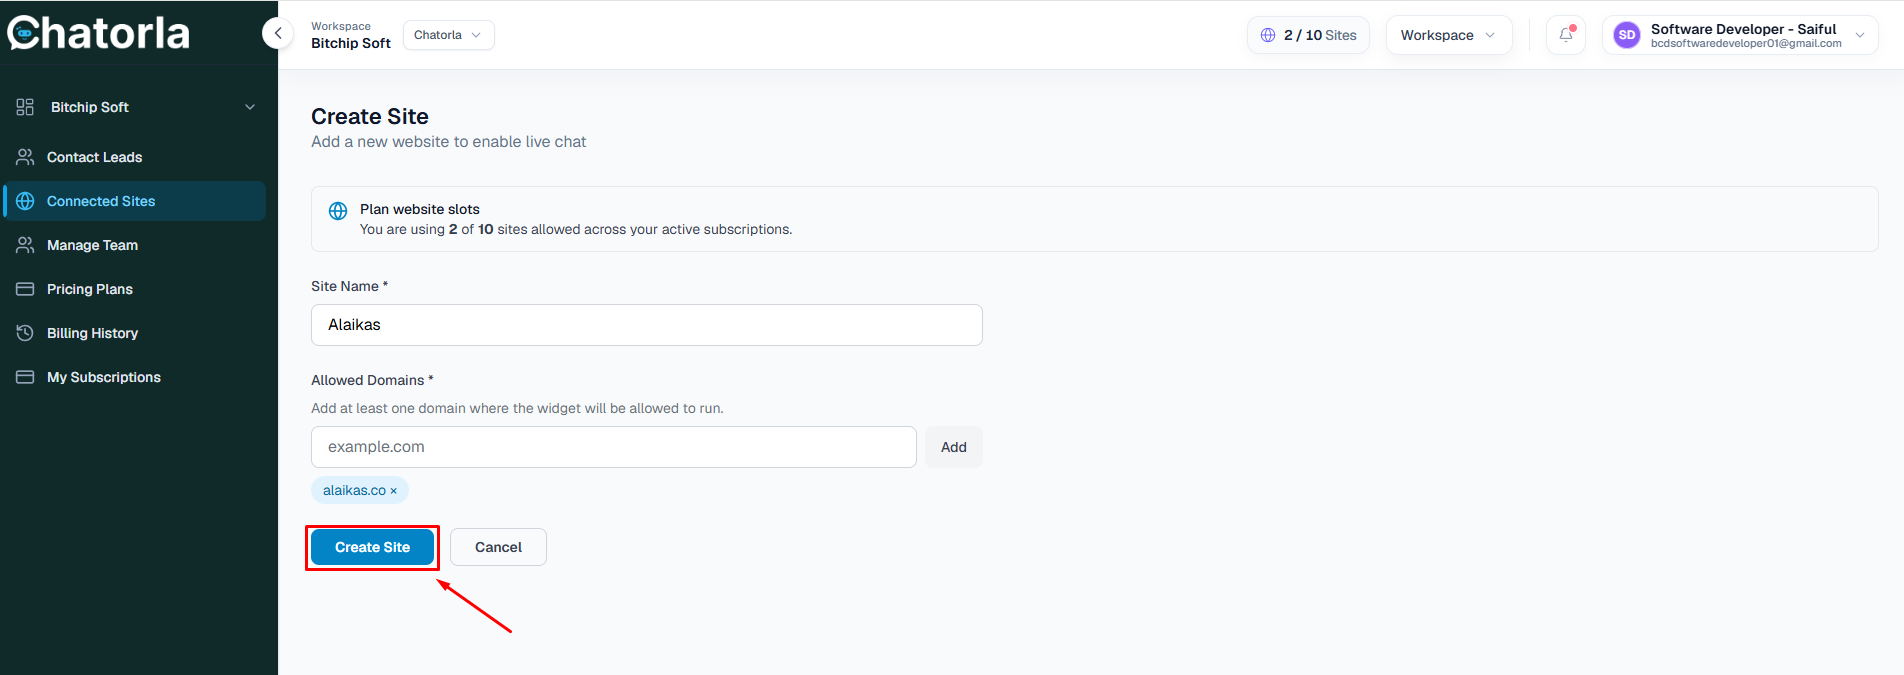
How to Add a New Connected Site
- From the left sidebar, click Connected Sites.
- On the Connected Sites page, click the Create Site button.
- You will be redirected to the Create Site page.
- Enter your Website Name.
- Enter your Website Domain.
- Click the add button.
- After that, click Create Site.
After creating the site, Chatorla will generate a widget installation script for that website.

How to Install the Widget on Your Website
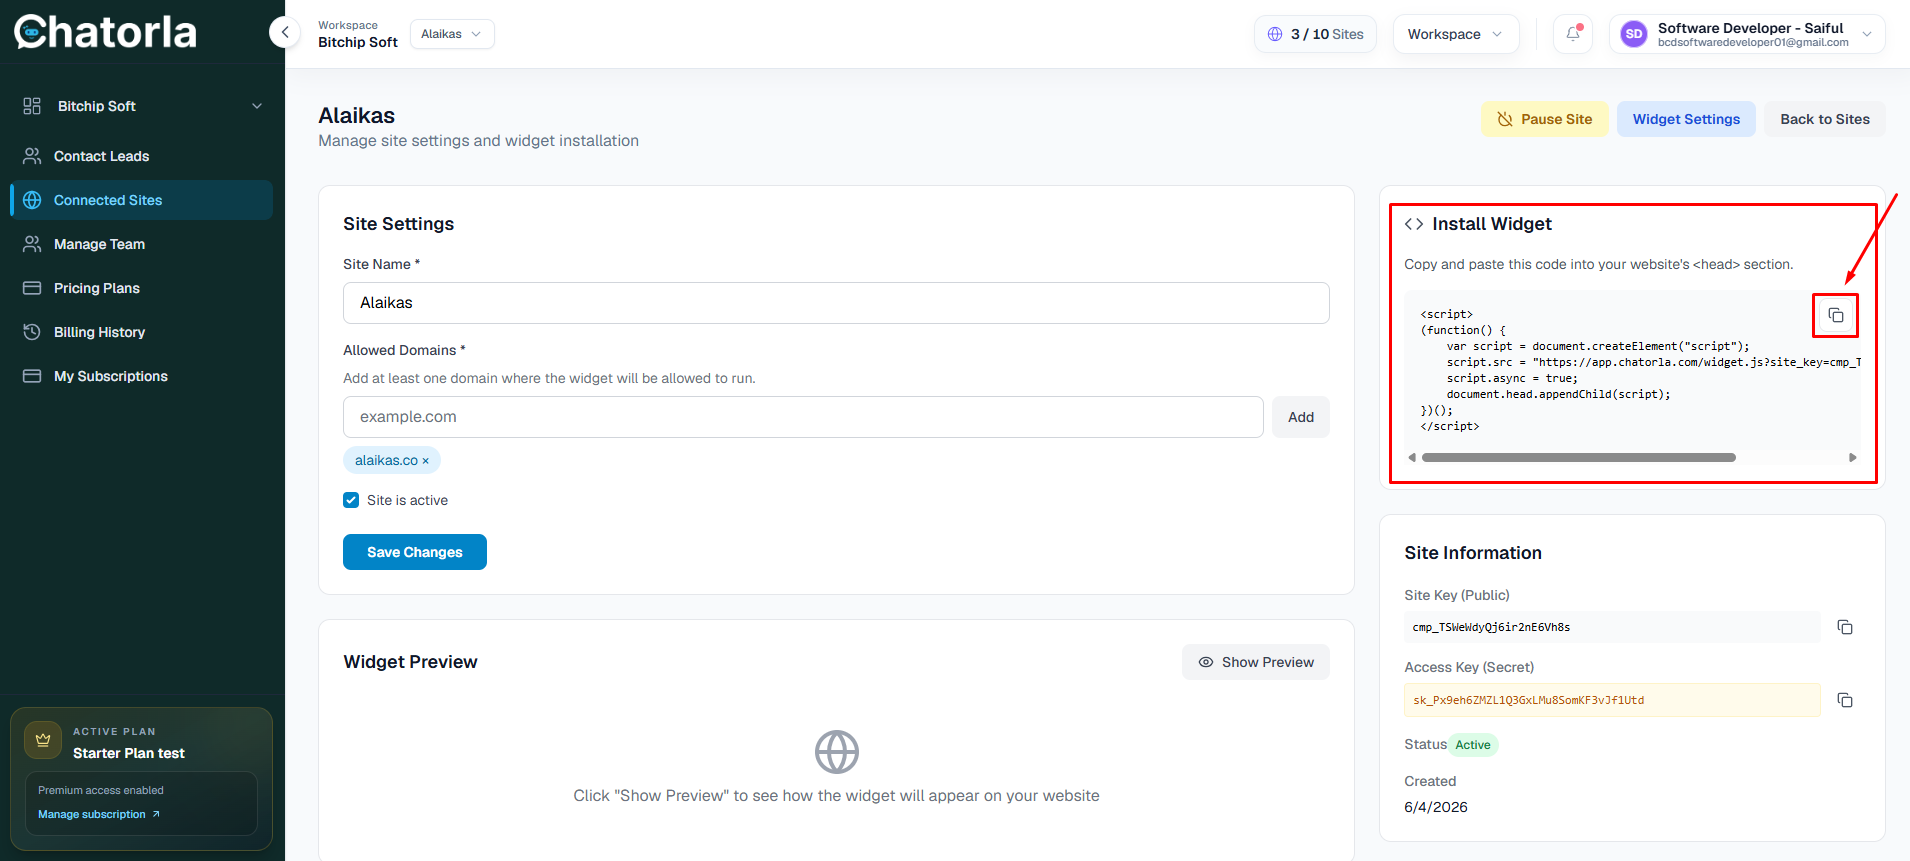
- Log in to your website dashboard.
- Paste the script before the closing
tag of your website. - Save the changes.
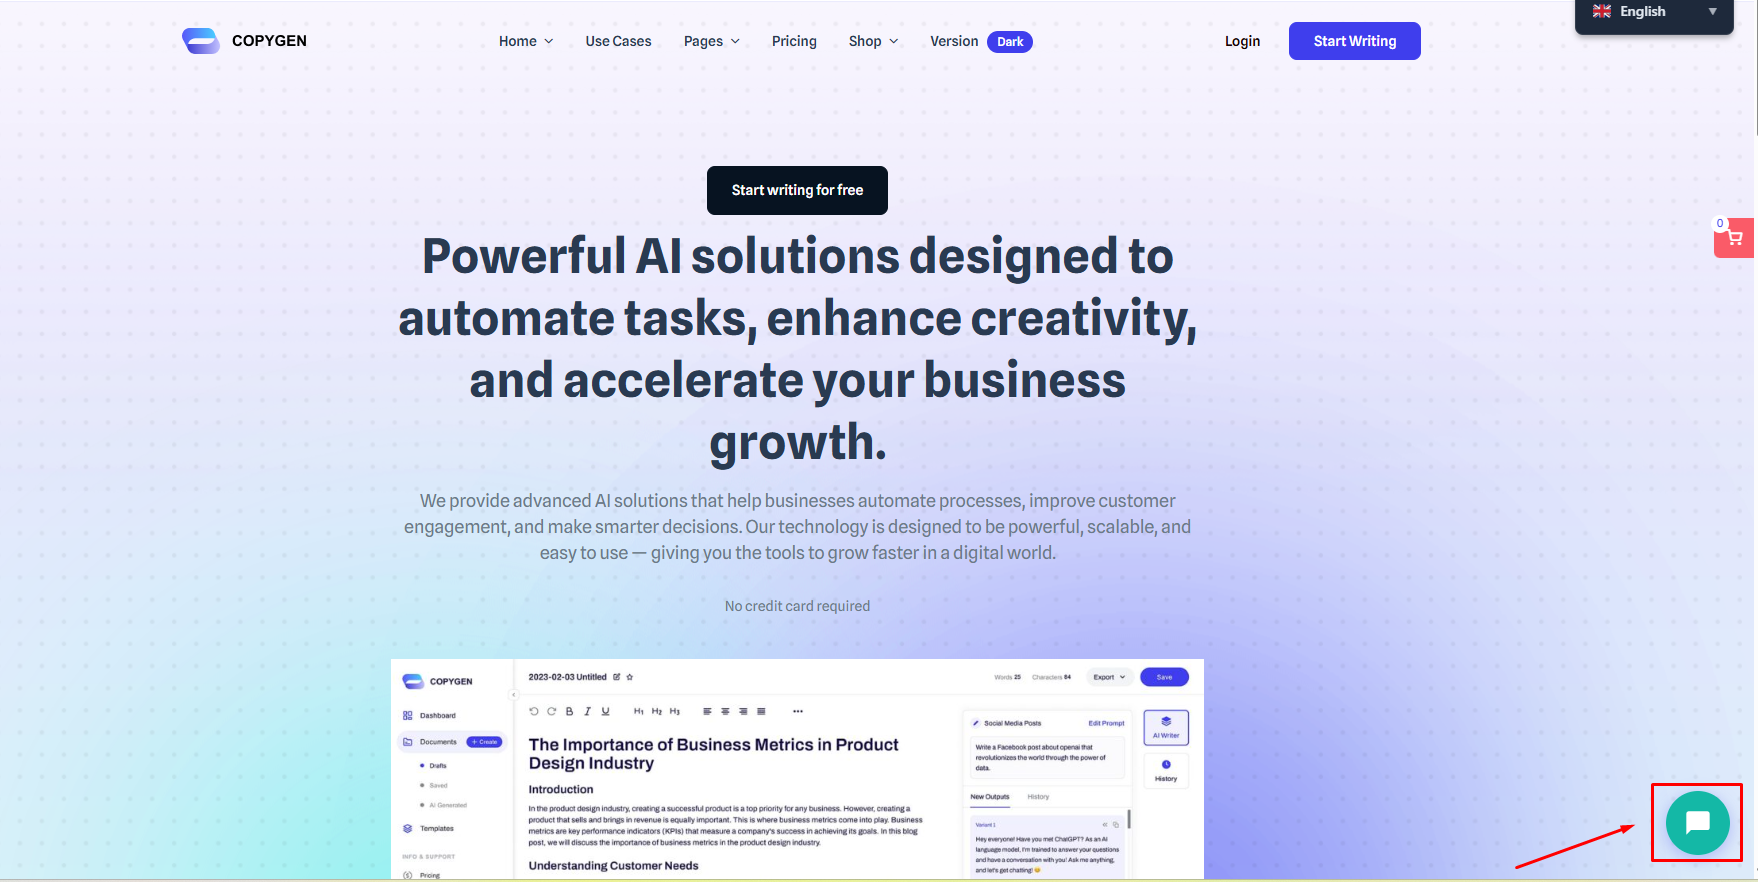
- Visit your website and check the bottom-right corner to confirm that the Chatorla chat widget appears.
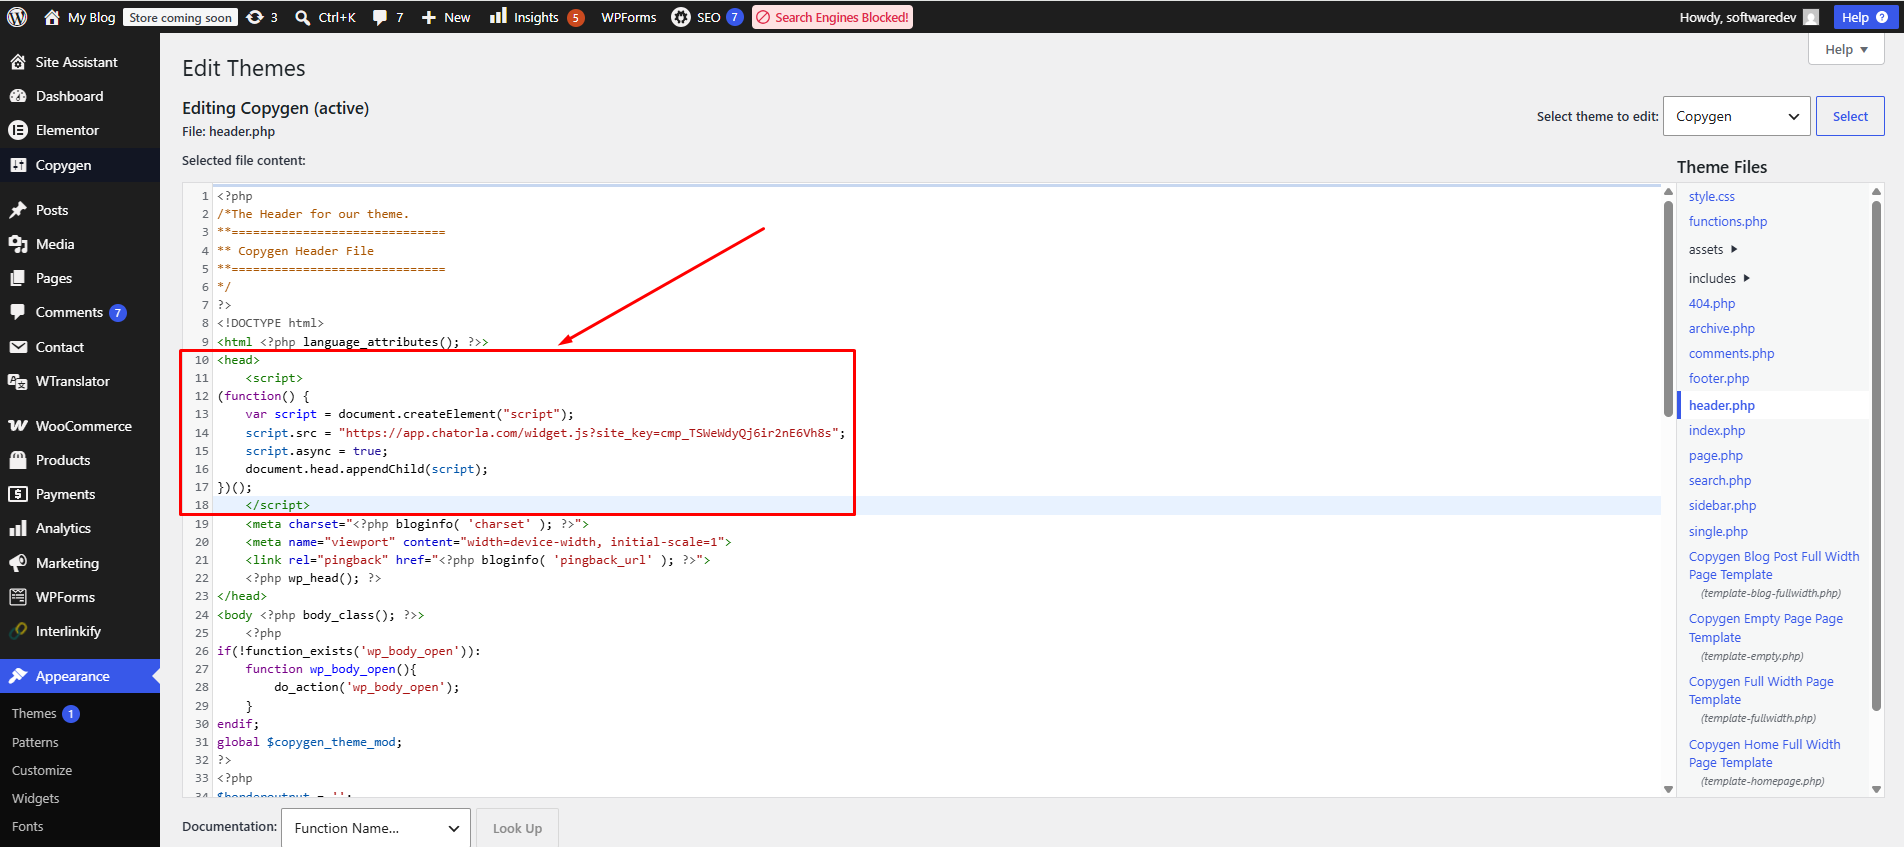
WordPress Installation Guide
To install Chatorla on a WordPress website:
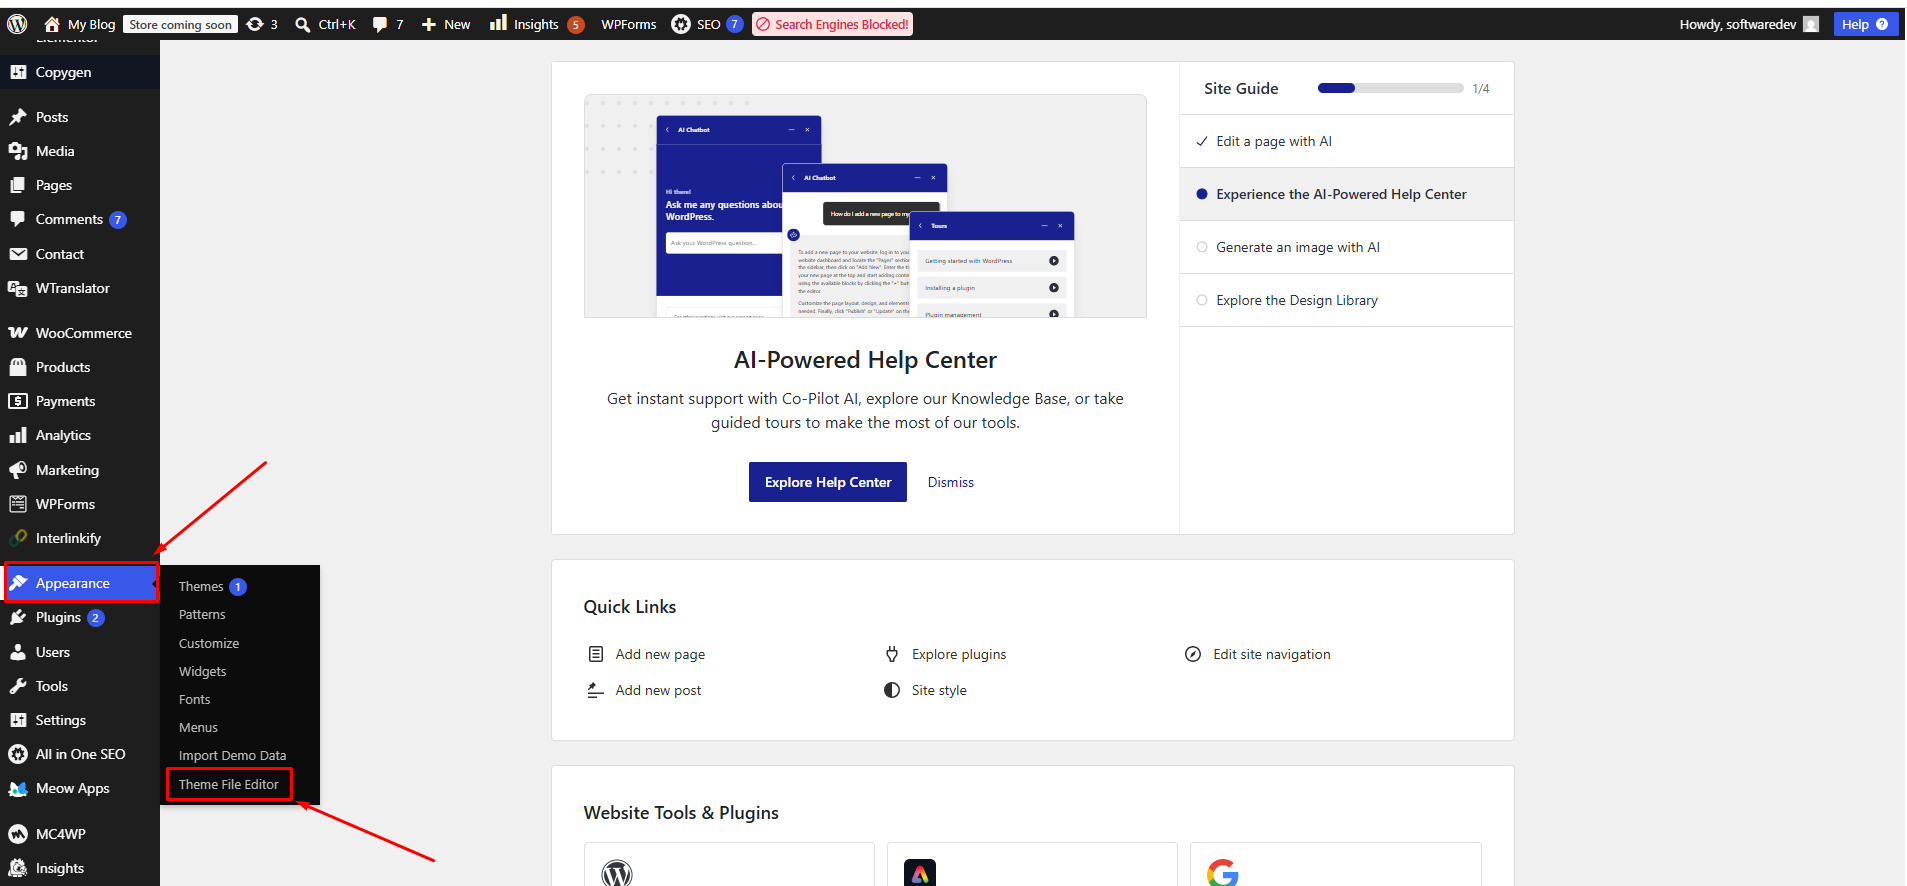
- Log in to your WordPress dashboard.
- Hover over Appearance.
- Click Theme File Editor.
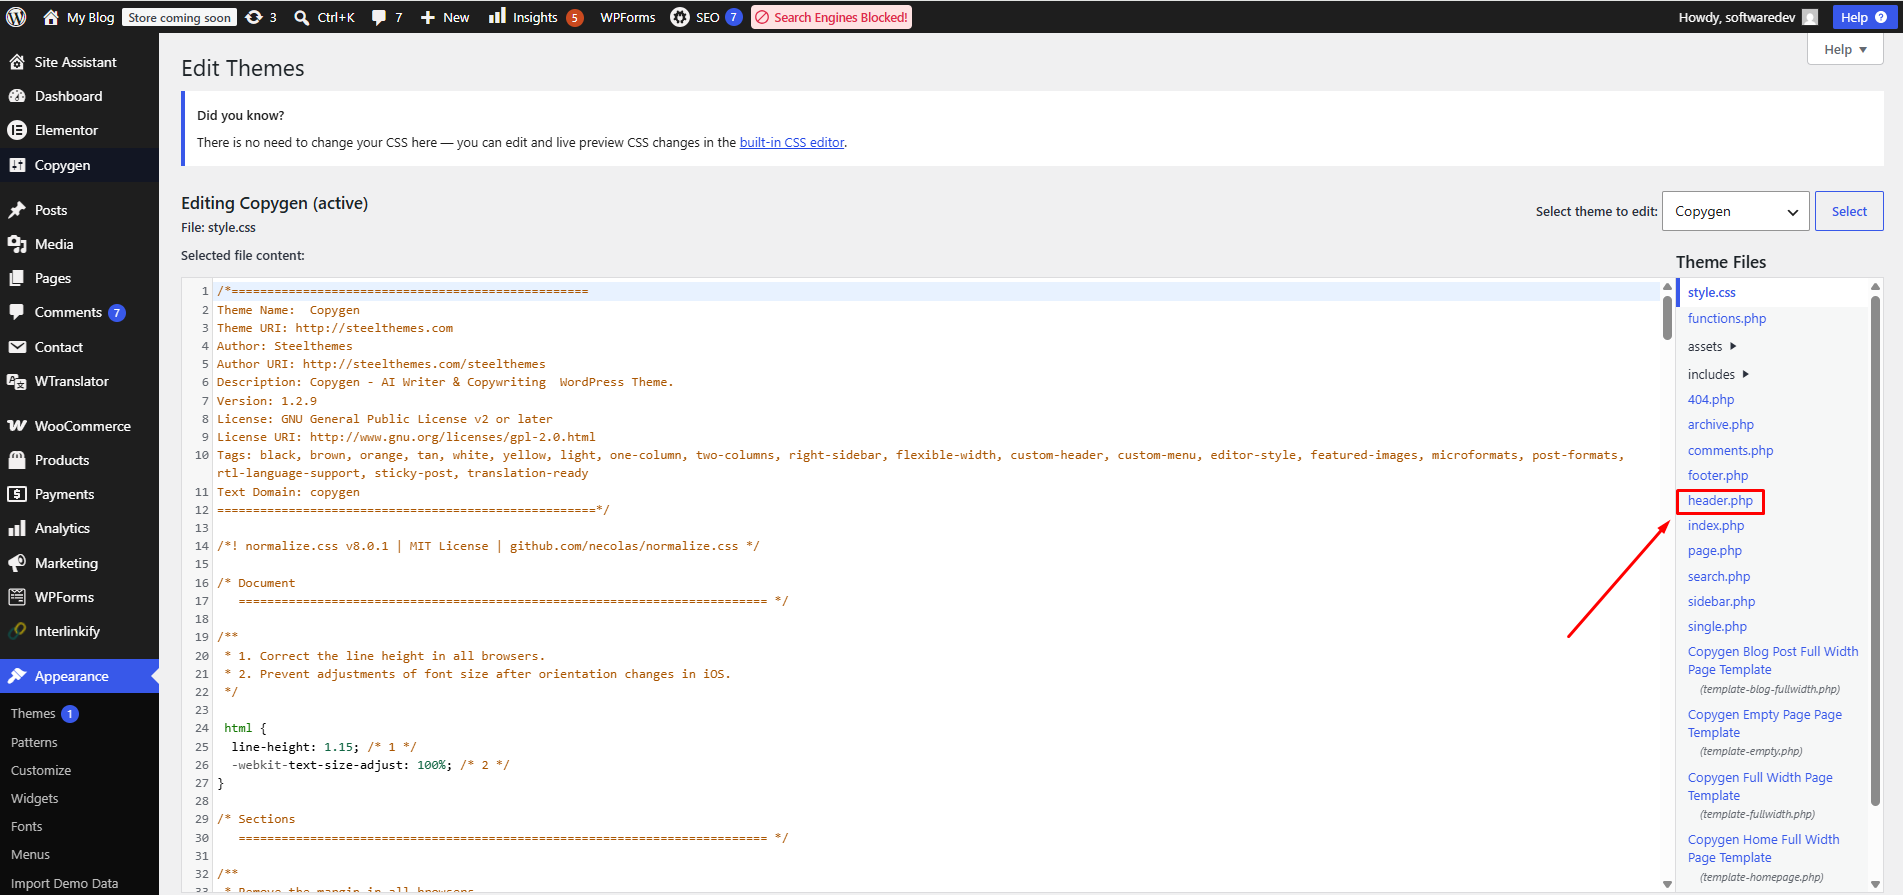
- Select the correct theme file, usually header.php.
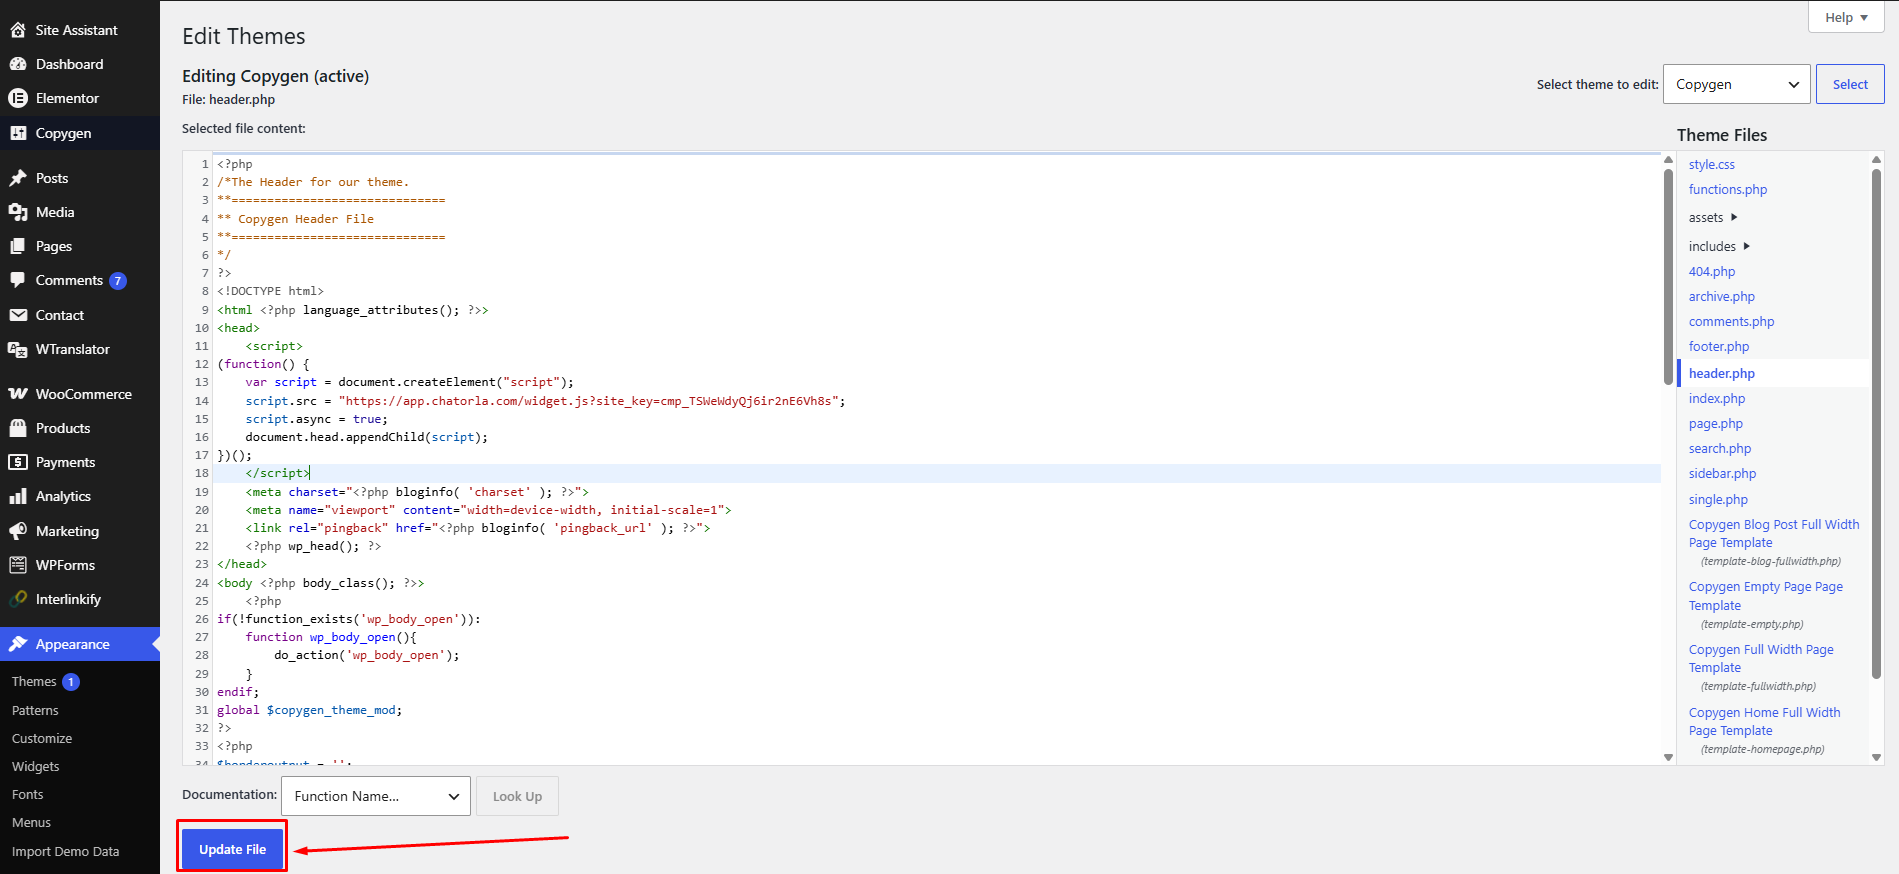
- Paste the Chatorla widget script before the closing
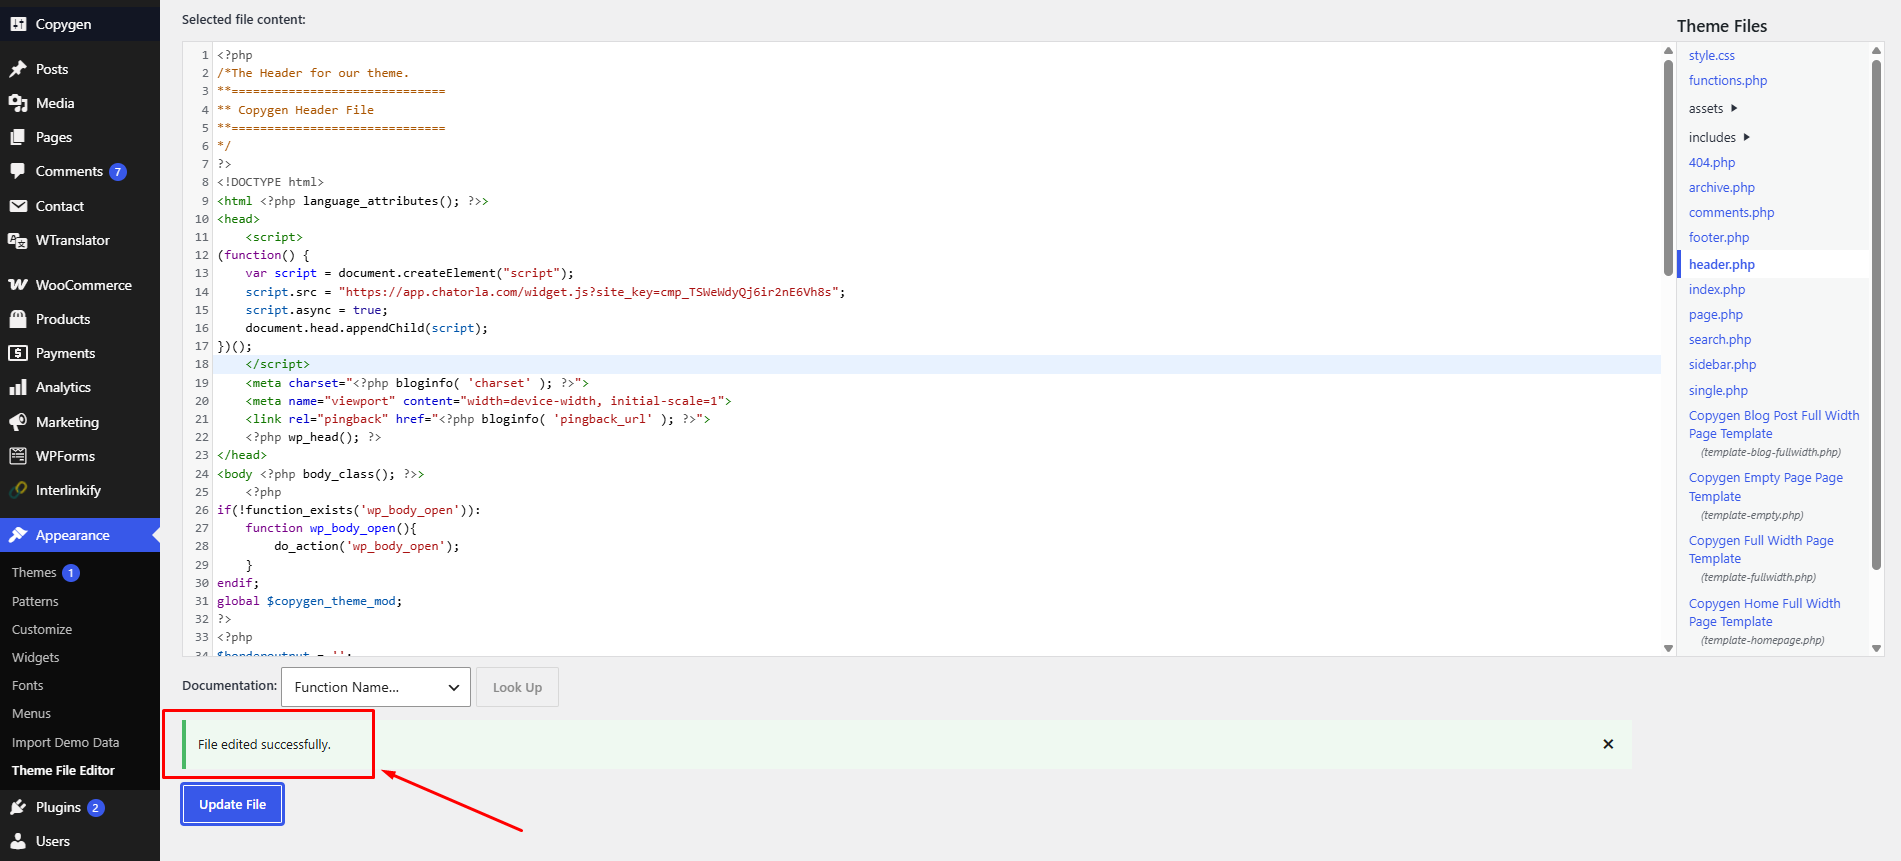
tag. - Click Update File.
Visit your website and confirm that the chat widget is visible.
Once installed successfully, the Chatorla chat button should appear on your website, usually at the bottom-right corner.
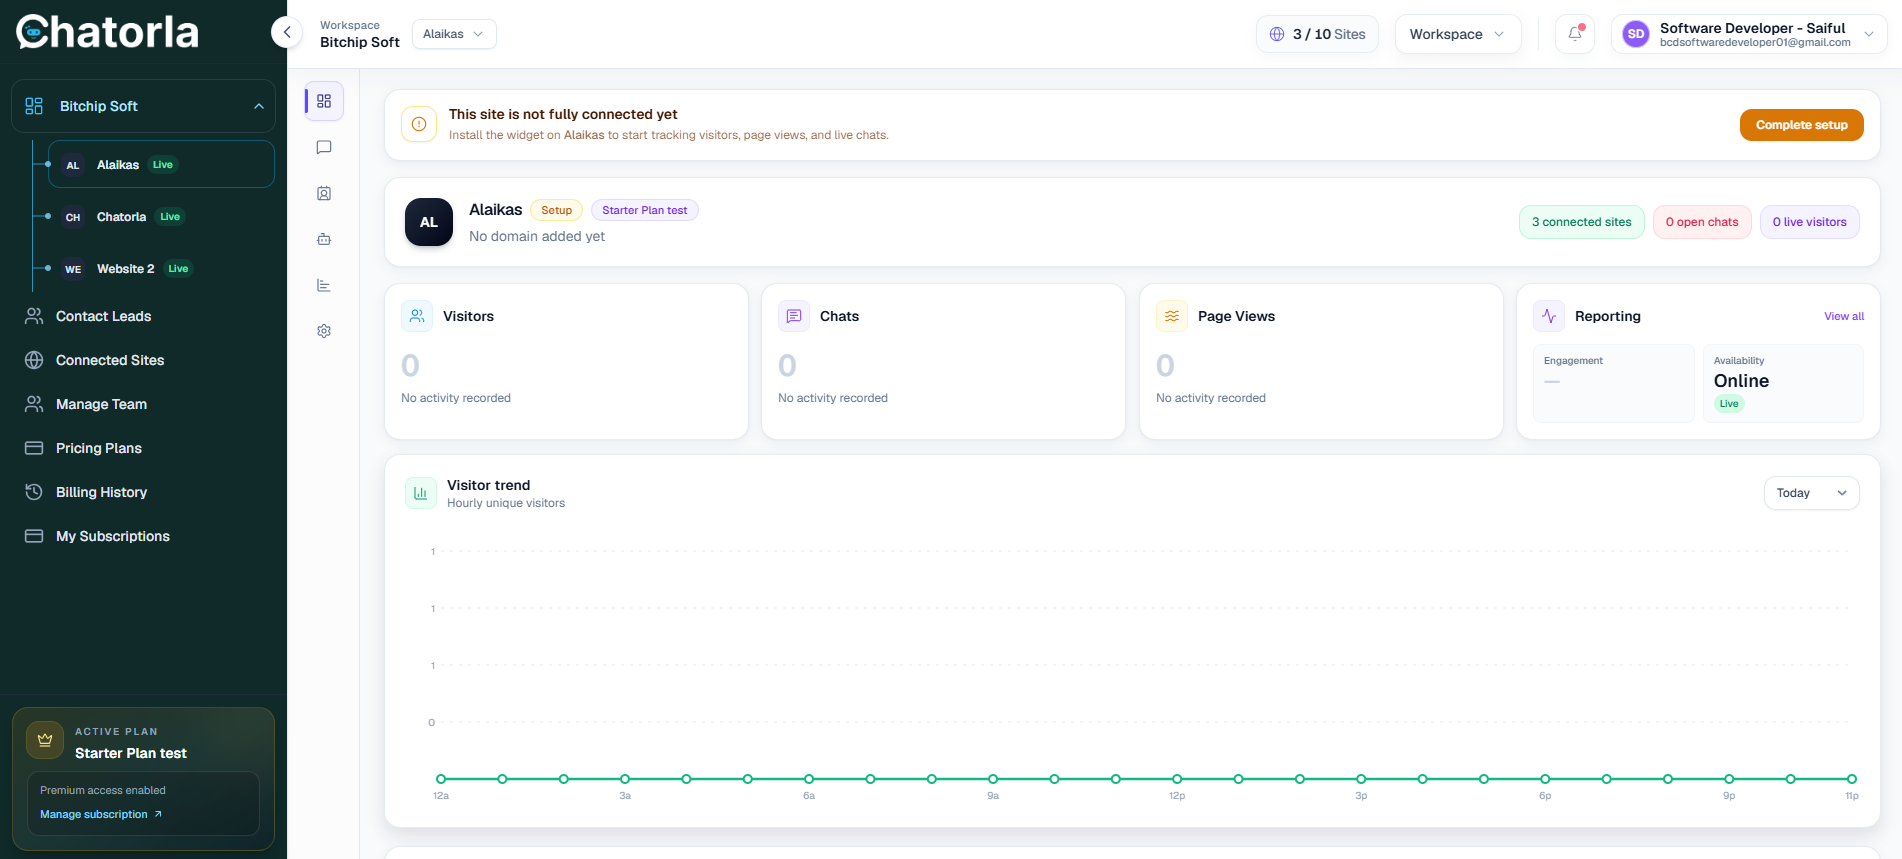
Dashboard
The Dashboard gives you an overview of your Chatorla account, connected websites, conversations, widget activity, and live chat performance.
Dashboard Overview
From the dashboard, you can view important activities such as:
- Connected site status.
- Total conversations.
- Visitors.
- Assigned chats.
- Widget performance.
- Recent chat activity.
- Live chat setup status.
This section helps you monitor how your chat widget is performing across your connected websites.
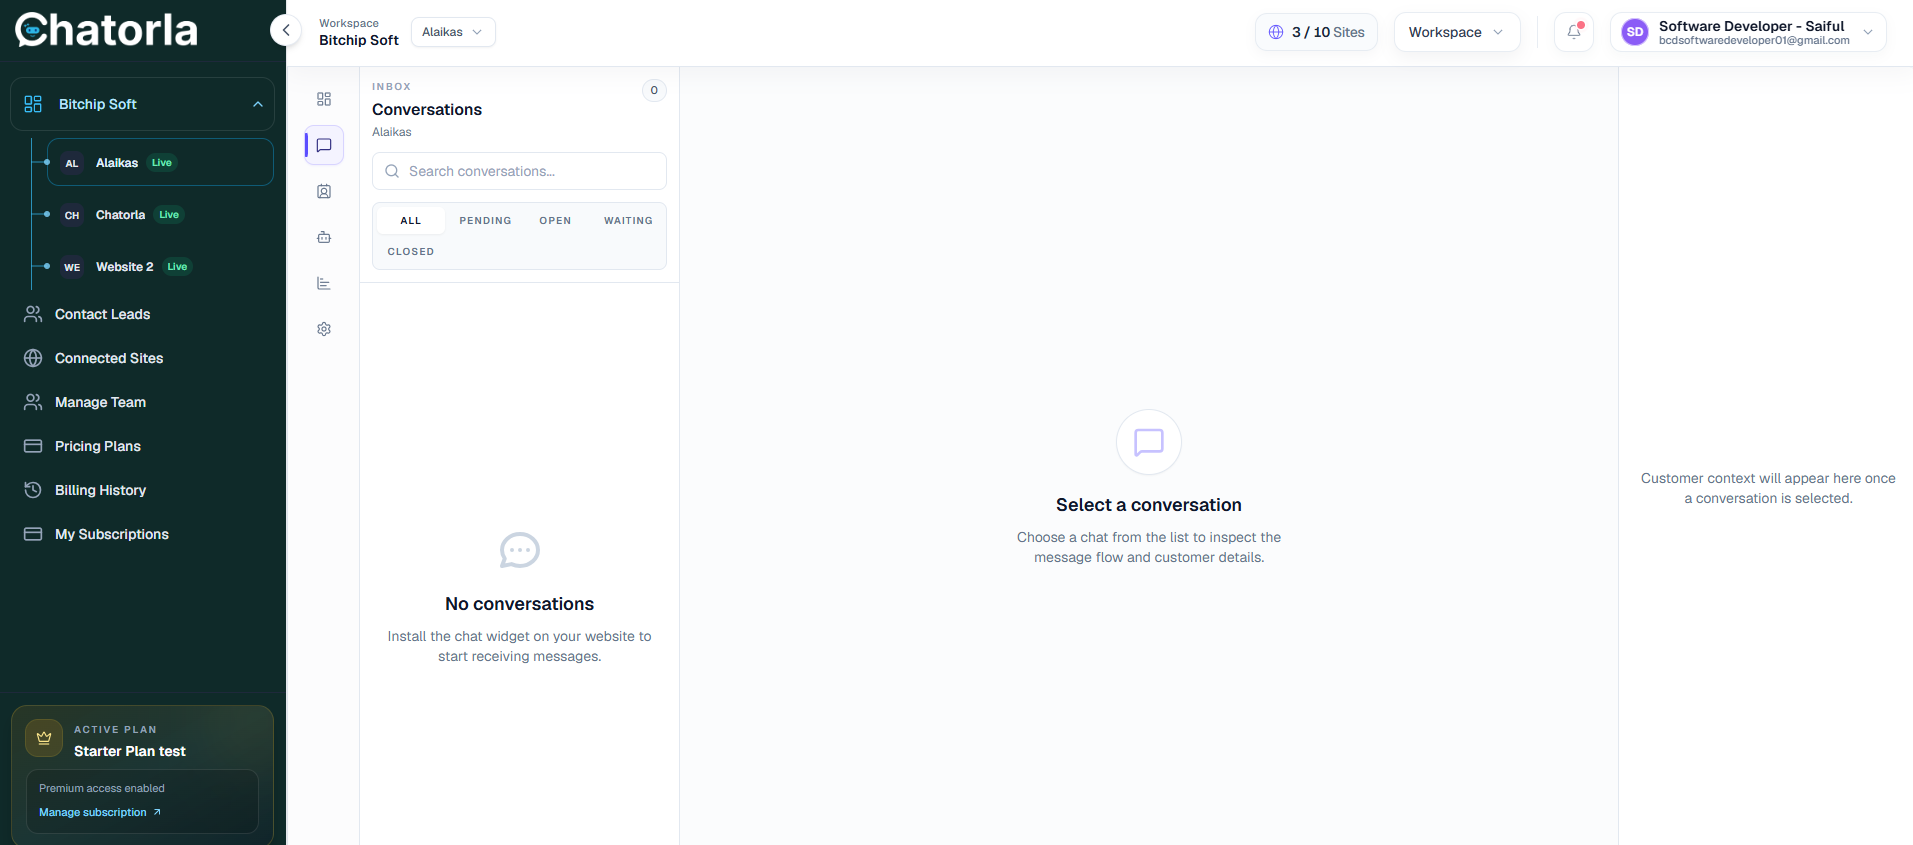
Conversations
The Conversations area allows you to manage chats from website visitors. If there are no current conversations, the page will show an empty state.
Use this section to:
- View visitor messages.
- Respond to live chats.
- Track open conversations.
- Manage communication from one place.
Widget Overview
The Widget Overview page is used to manage the main property settings for your Chatorla chat widget. From this page, you can update the property identity, upload a property image, copy important widget references, manage key terms, control privacy settings, and access the JavaScript API key.
Property Identity
The Property Identity section allows you to manage the basic information of your widget property.
Here you can update:
- Property Name — Enter or edit the name of your property. This name helps you identify the widget inside your Chatorla dashboard.
- Status — Use the status toggle to enable or disable the property. If the status is Active, the widget can work on your connected website. If the status is disabled, the widget may stop working for visitors.
- Property URL — Add or update the website URL where this widget will be used.
After making changes, click Save to update the information.
Property Image
The Property Image section allows you to upload an image or logo for your widget property.
Chatorla recommends using a square image of at least 512 × 512 pixels for the best result. This image may appear in listings, discovery sections, or other property-related areas after upload.
To add an image:
- Click the plus (+) icon on the image box.
- Upload your preferred property image.
- Wait for the image to upload successfully.
Property Reference
The Property Reference section shows your unique Property ID.
This ID is used to identify your property inside Chatorla. You can copy the Property ID by clicking the copy icon beside the field.
Use this ID carefully when connecting, configuring, or troubleshooting your widget.
Keyterms
The Keyterms section lets you add short phrases that help classify and search your property.
To add a keyterm:
- Enter a keyword or short phrase in the Add a keyterm field.
- Click the plus (+) button.
- Click Save keyterms to save the changes.
Keyterms help organize your property and make it easier to identify based on important topics, services, or business categories.
Data & Privacy
The Data & Privacy section controls privacy-related tracking options for your widget.
In this section, you can manage:
- Visitor IP Tracking — Use the toggle to enable or disable visitor IP tracking. If enabled, Chatorla can track visitor IP information for analytics, security, and visitor identification purposes. If disabled, visitor IP tracking will not be active.
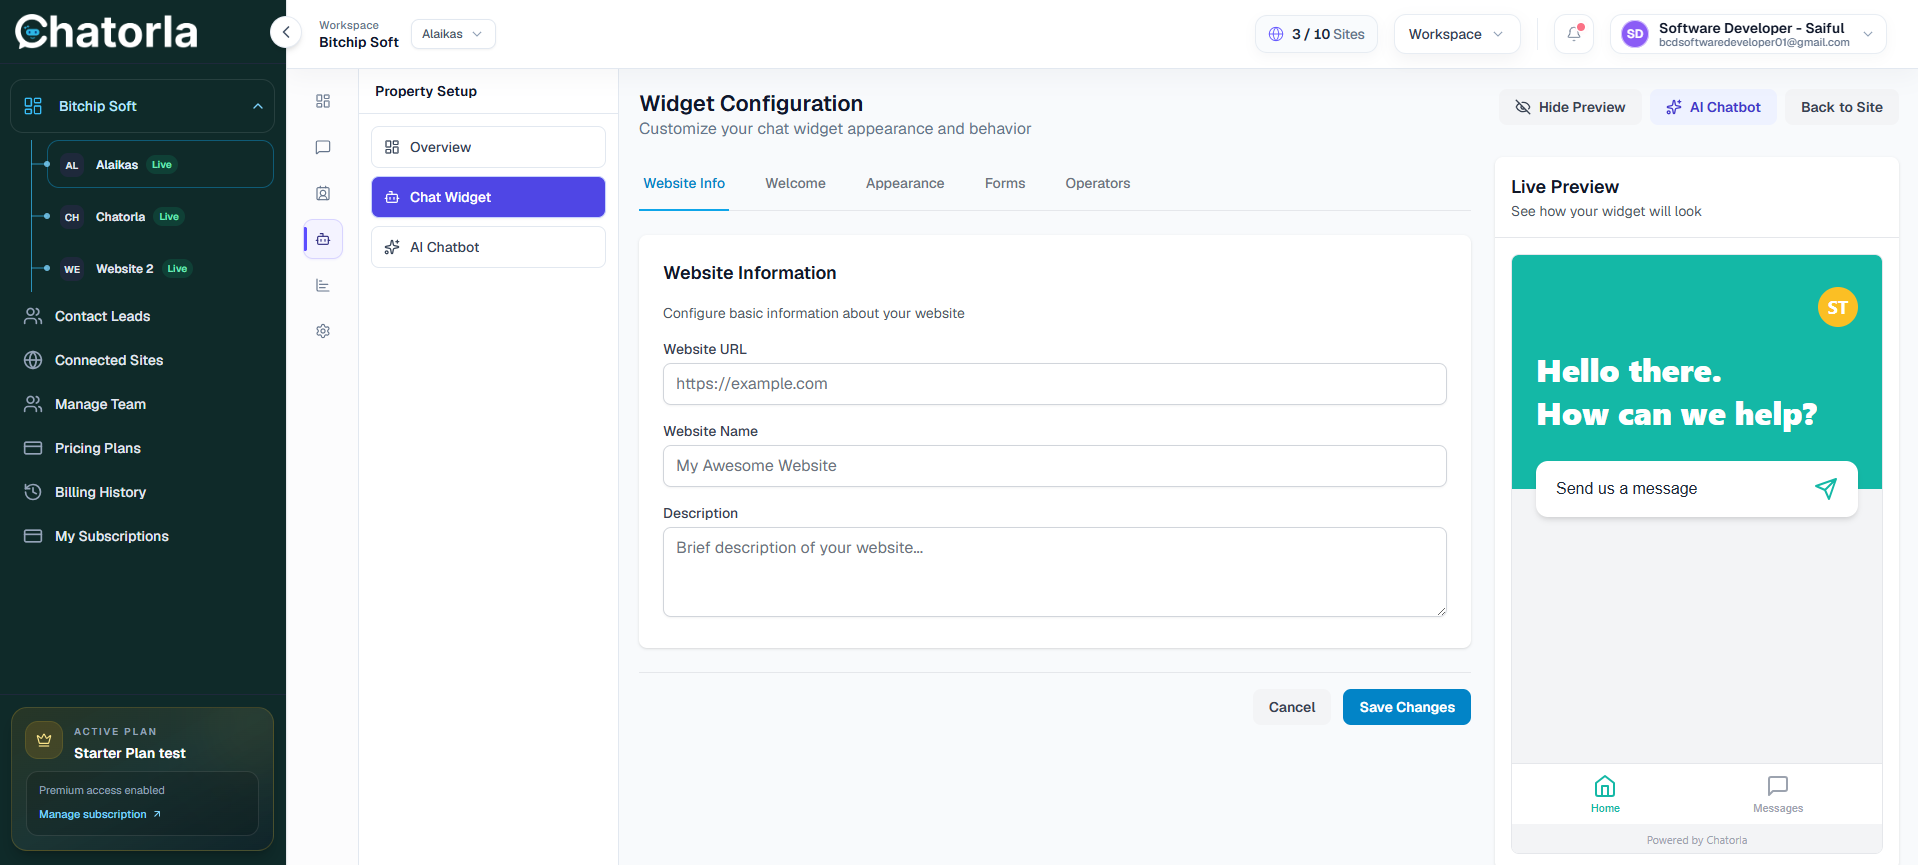
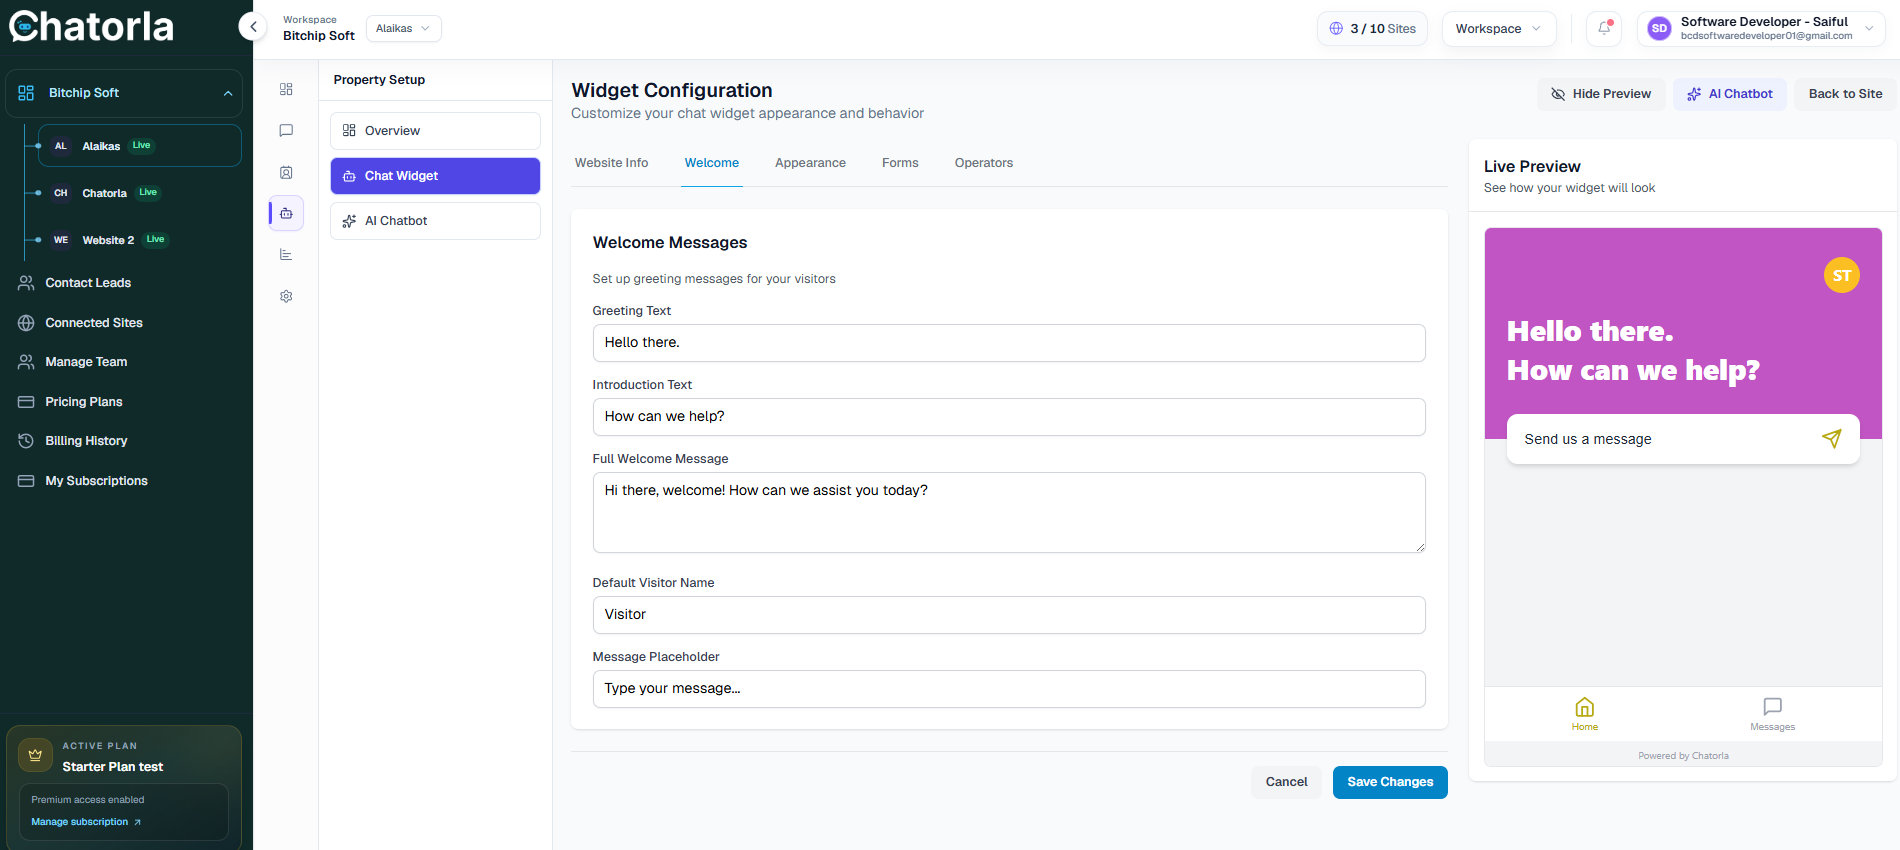
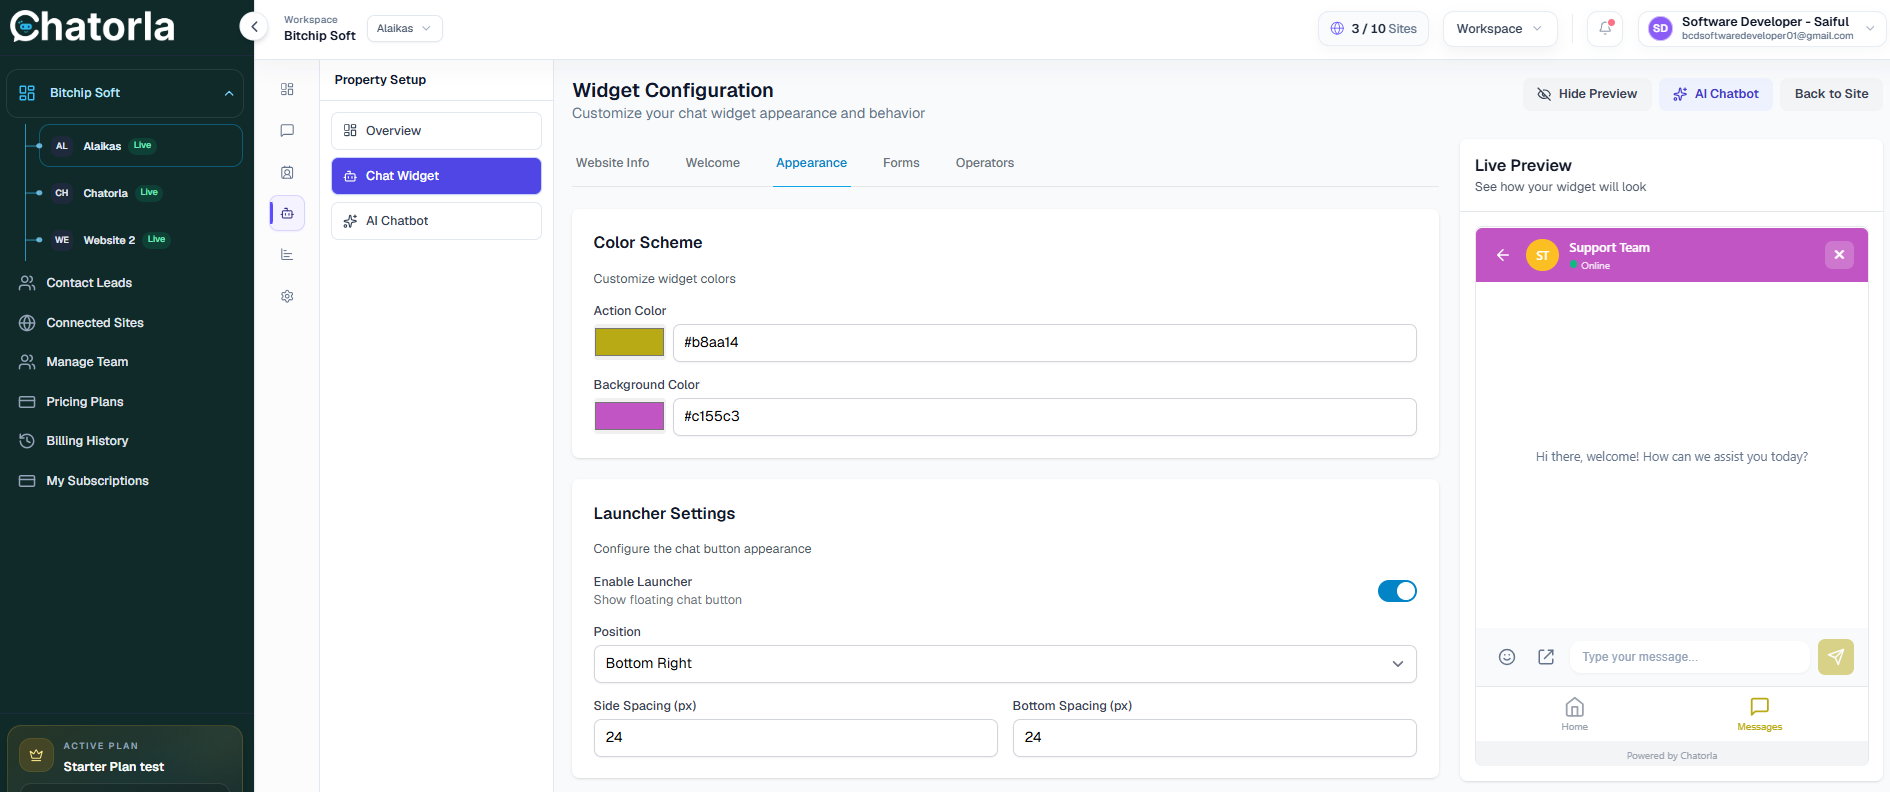
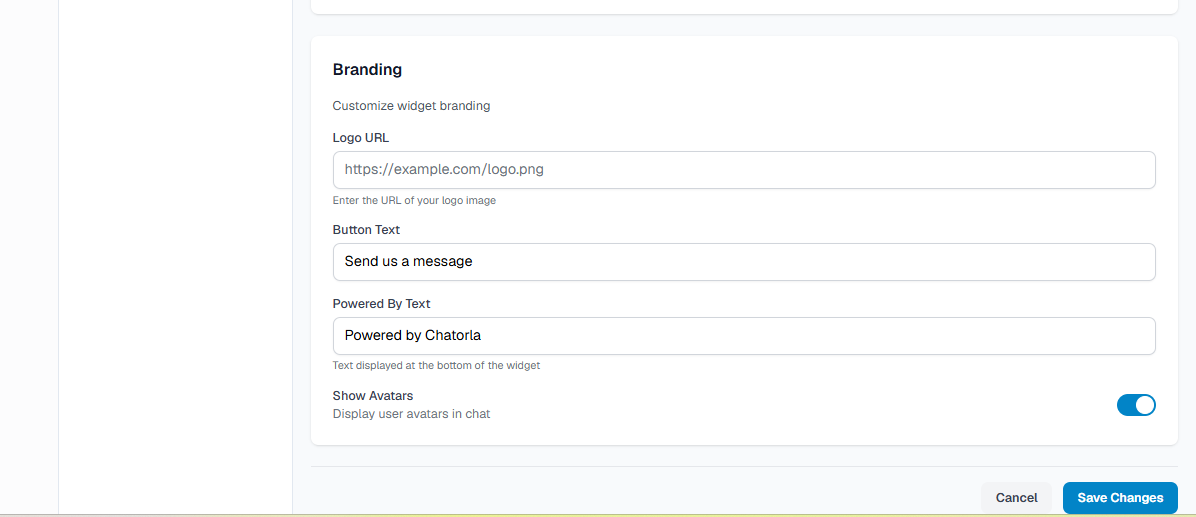
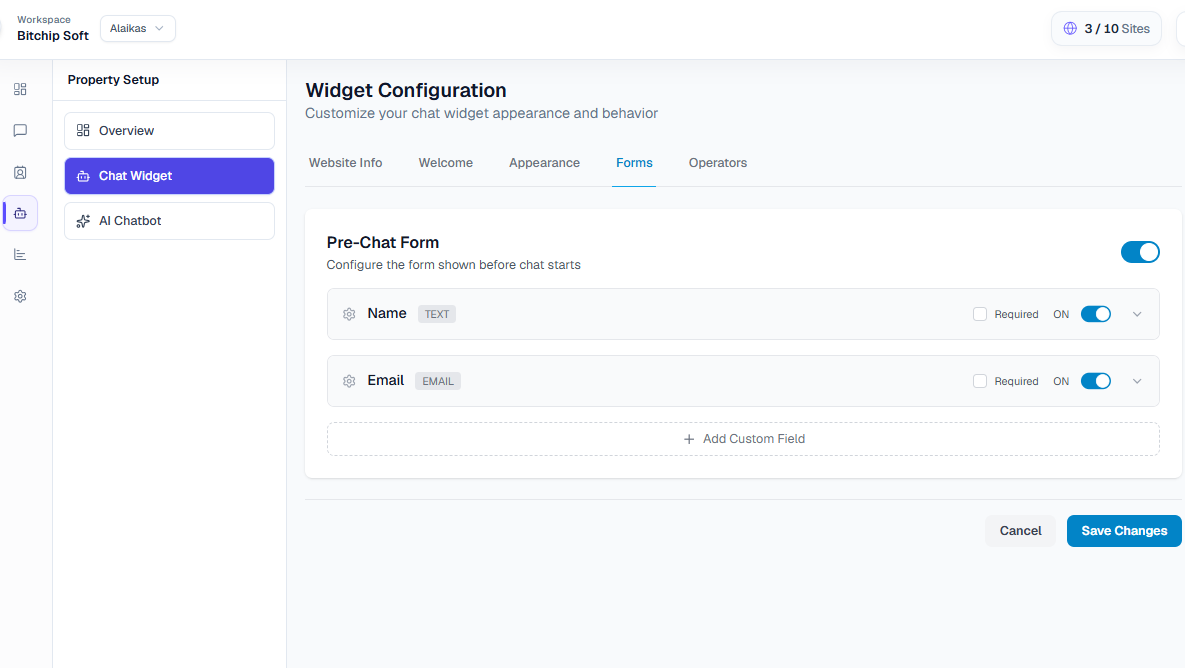
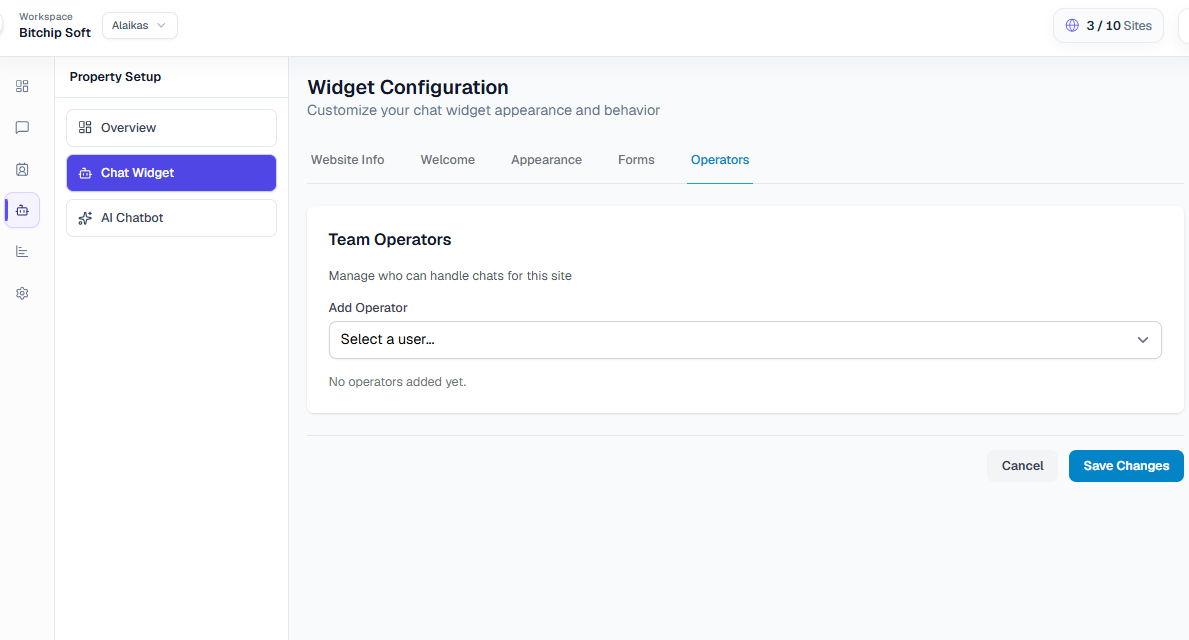
Widget Configuration
The Widget Configuration area lets you customize how your chat widget appears on your website.
You can update details such as:
- Website Info.
- Welcome message.
- Description.
- Brand color.
- Chat appearance.
- Widget text.
- Forms.
- Team Operators.
A live preview appears on the right side so you can see how the chat widget will look before saving changes.
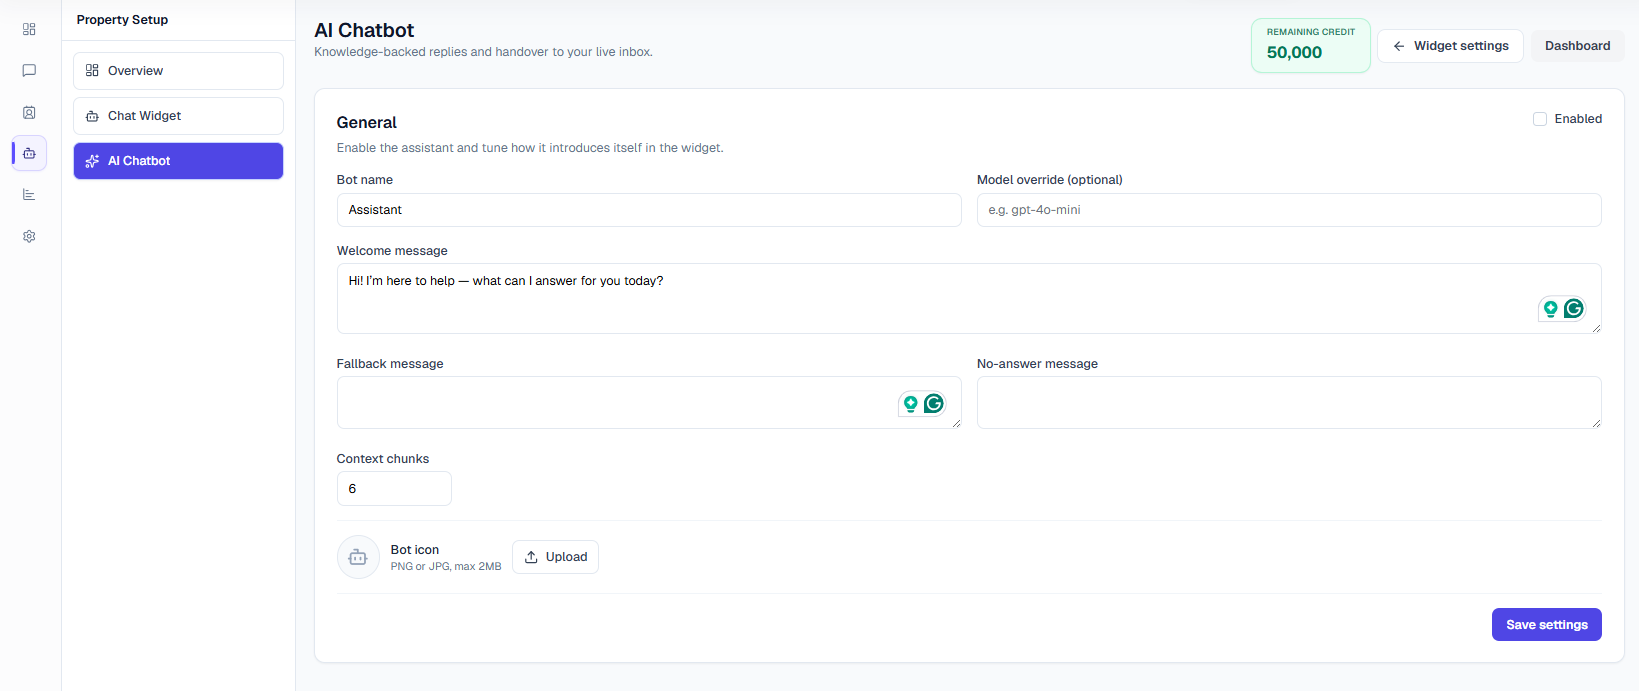
AI Chatbot
The AI Chatbot section is used to configure AI-powered replies for customer support.
AI Chatbot Setup Guide: Enable Chatbot.mp4
You can manage:
- Bot name.
- AI response behavior.
- Knowledge source.
- Chatbot instructions.
- Automated support replies.
This is useful for reducing manual support work and helping visitors get answers faster.
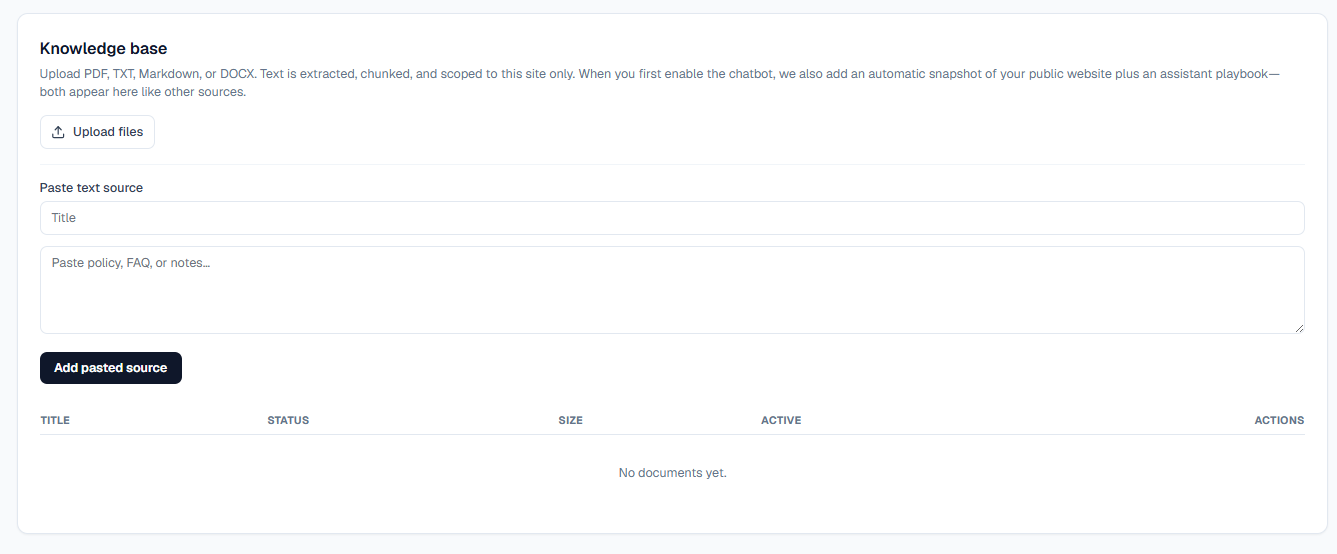
Knowledge Base
The Knowledge Base area lets you add helpful support content that the chatbot can use to answer customer questions.
You can add:
- Help articles.
- FAQs.
- Documentation content.
- Support answers.
- Product information.
A strong knowledge base improves chatbot accuracy and helps users solve problems without waiting for a live agent.
Live Agent Transfer
The Live Agent Transfer section lets you hand over a chatbot conversation to your support team when a visitor's message matches specific trigger phrases.
- Enable or Disable Transfer — Use the toggle to turn live agent transfer on or off.
- Transfer Reply — Add the message visitors will see when the bot transfers the chat to your team. Example: "Our support team will reply within a maximum of 24 hours."
- Trigger Phrases — Add phrases like refund, billing, cancel plan, or talk to support. When visitors use these phrases, the bot will stop and hand off the chat.
- Add Phrase — Click Add phrase to include more trigger words or questions.
- Save Transfer Rules — After editing, click Save transfer rules to apply the changes.
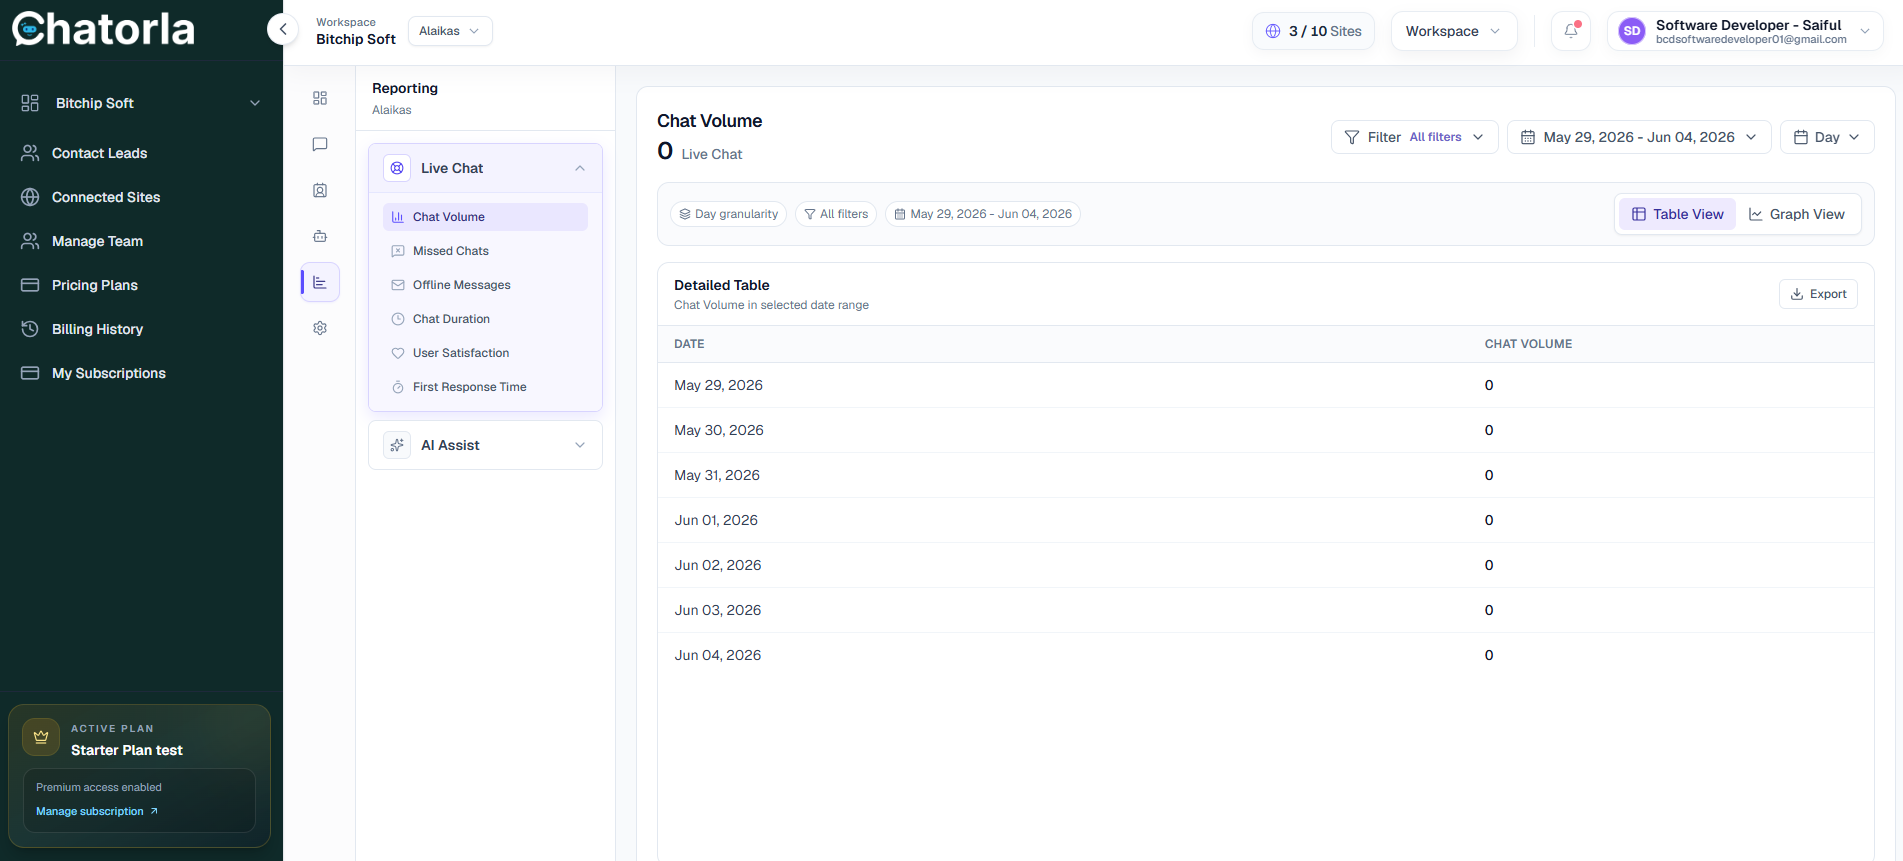
Reporting
The Reporting section helps you track live chat performance and understand how visitors interact with your support team.
Main Reporting Options
- Chat Volume — Shows how many live chat conversations happened within a selected date range.
- Missed Chats — Displays chats that were not answered by your team.
- Offline Messages — Shows messages submitted when your team was unavailable.
- Chat Duration — Helps you review how long conversations usually last.
- User Satisfaction — Tracks visitor feedback and satisfaction scores.
- First Response Time — Shows how quickly your team responds to new chats.
Filters and Date Range
You can filter reports by:
- Date range
- Day granularity
- All filters
- Table view or graph view
Export Report
Use the Export button to download report data for internal review, team analysis, or performance tracking.
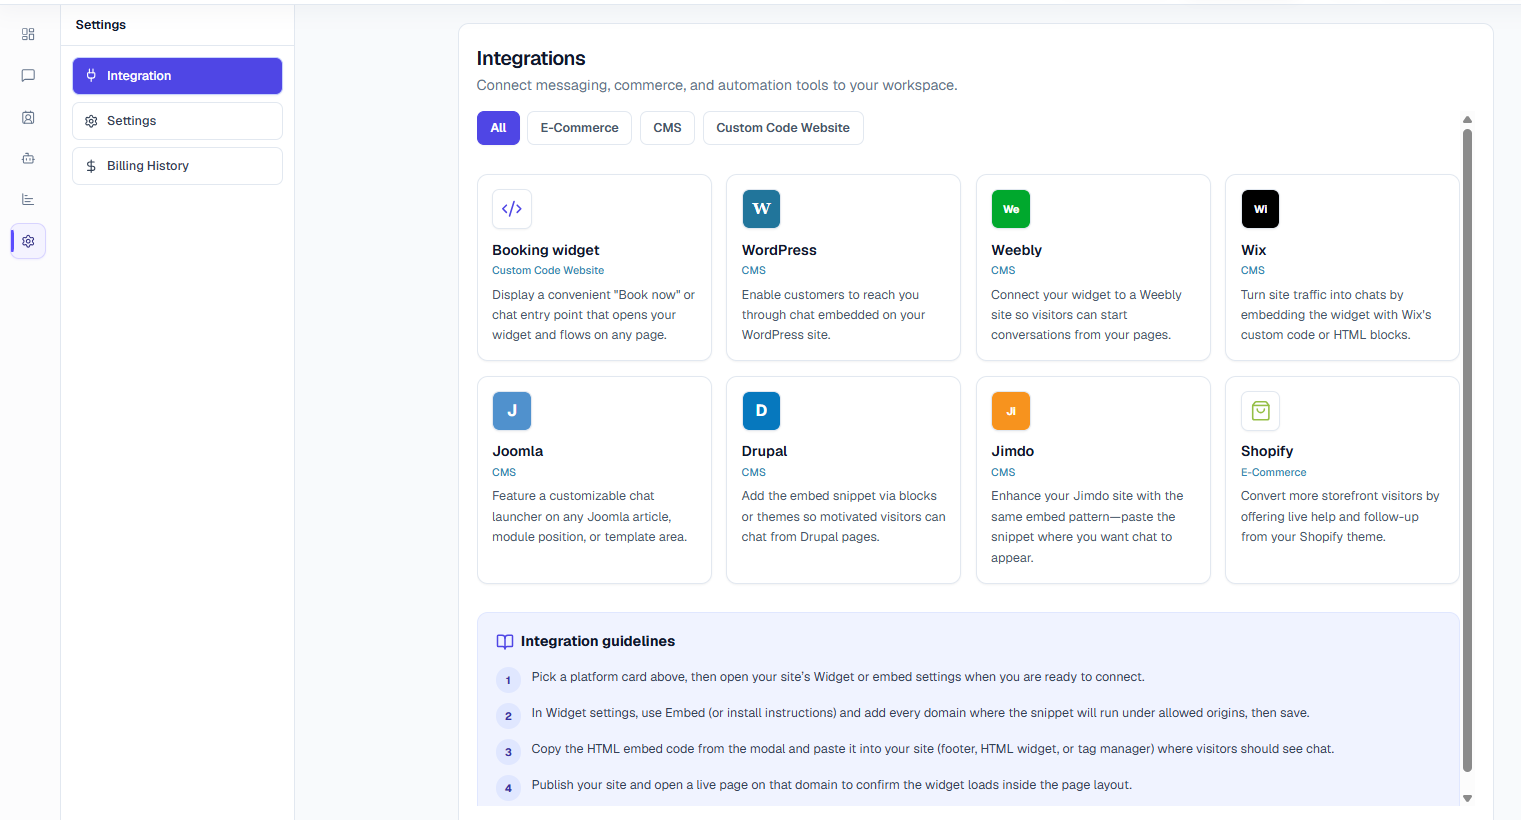
Integration Section
The Integration section helps you connect Chatorla with different website platforms, CMS systems, e-commerce stores, and custom websites.
Short Description
Integrations make it easy to install the Chatorla chat widget on your website and connect your workspace with the platform you use.
Available Integration Options
- Booking Widget — Add a "Book Now" or chat entry point to any page using a custom code website setup.
- WordPress — Embed the Chatorla chat widget on your WordPress website.
- Weebly — Connect the widget to a Weebly website so visitors can start conversations from your pages.
- Wix — Add the widget using Wix custom code or HTML blocks.
- Joomla — Place the chat launcher inside a Joomla article, module position, or template area.
- Drupal — Add the embed snippet through Drupal blocks or theme sections.
- Jimdo — Paste the widget snippet where you want the chat widget to appear.
- Shopify — Add live chat to your Shopify store to support visitors and follow up with customers.
Integration Guidelines
- Choose the platform card that matches your website.
- Open your site's widget, embed, or custom code settings.
- Copy the Chatorla HTML embed code.
- Paste the code into your website where the chat widget should load.
- Publish your site and open a live page to confirm the widget is working.
Contract Leads
The Contact Leads section helps you store, manage, and organize leads collected through the Chatorla widget.
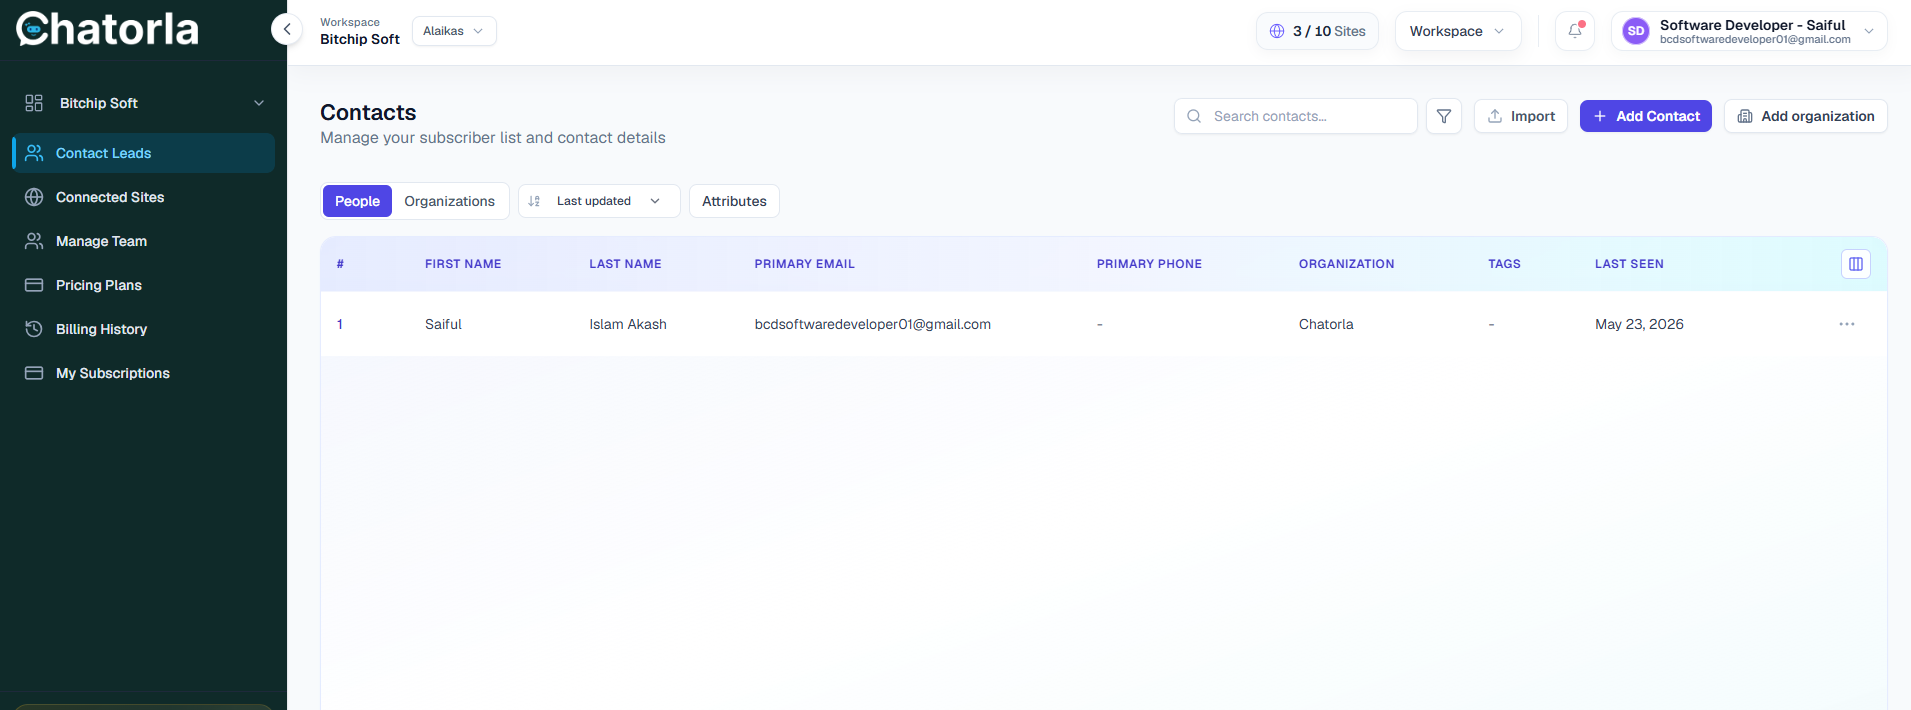
When visitors share their details through live chat, chatbot forms, or lead capture flows, their information appears in this section.
Personal Leads
The People tab stores individual contact details collected from visitors.
You can view information such as:
- First Name — Shows the visitor's first name.
- Last Name — Shows the visitor's last name.
- Primary Email — Displays the visitor's main email address.
- Primary Phone — Shows the visitor's phone number, if collected.
- Organization — Displays the company or organization connected to the lead.
- Tags — Helps you categorize or label leads for easier management.
- Last Seen — Shows the last time the visitor was active or seen.
Organization Leads
The Organizations tab helps you manage company-based leads instead of individual contacts.
This is useful when multiple contacts belong to the same company or business.
You can use organization leads to:
- Store company information.
- Group related contacts under one organization.
- Track business-level opportunities.
- Manage B2B leads more clearly.
- Follow up with companies instead of only individual visitors.
Contact Lead Actions
From the Contact Leads section, you can:
- Search Contacts — Quickly find a lead using the search bar.
- Filter Contacts — Use filters to organize and narrow down your contact list.
- Import Contacts — Upload or import existing leads into Chatorla.
- Add Contact — Manually create a new personal lead.
- Add Organization — Add a company or business as an organization lead.
- Manage Attributes — Customize lead information using attributes.
How Contact Leads Help
Contact Leads are useful for:
- Following up with potential customers.
- Managing personal and company leads.
- Tracking website enquiries.
- Organizing leads from live chat and chatbot conversations.
- Supporting sales and customer support teams.
- Keeping visitor details in one central place.
Manage Team
The Manage Teams section helps you organize support members and assign roles inside your Chatorla workspace. The uploaded documentation labels this section as 5. Manage teams.
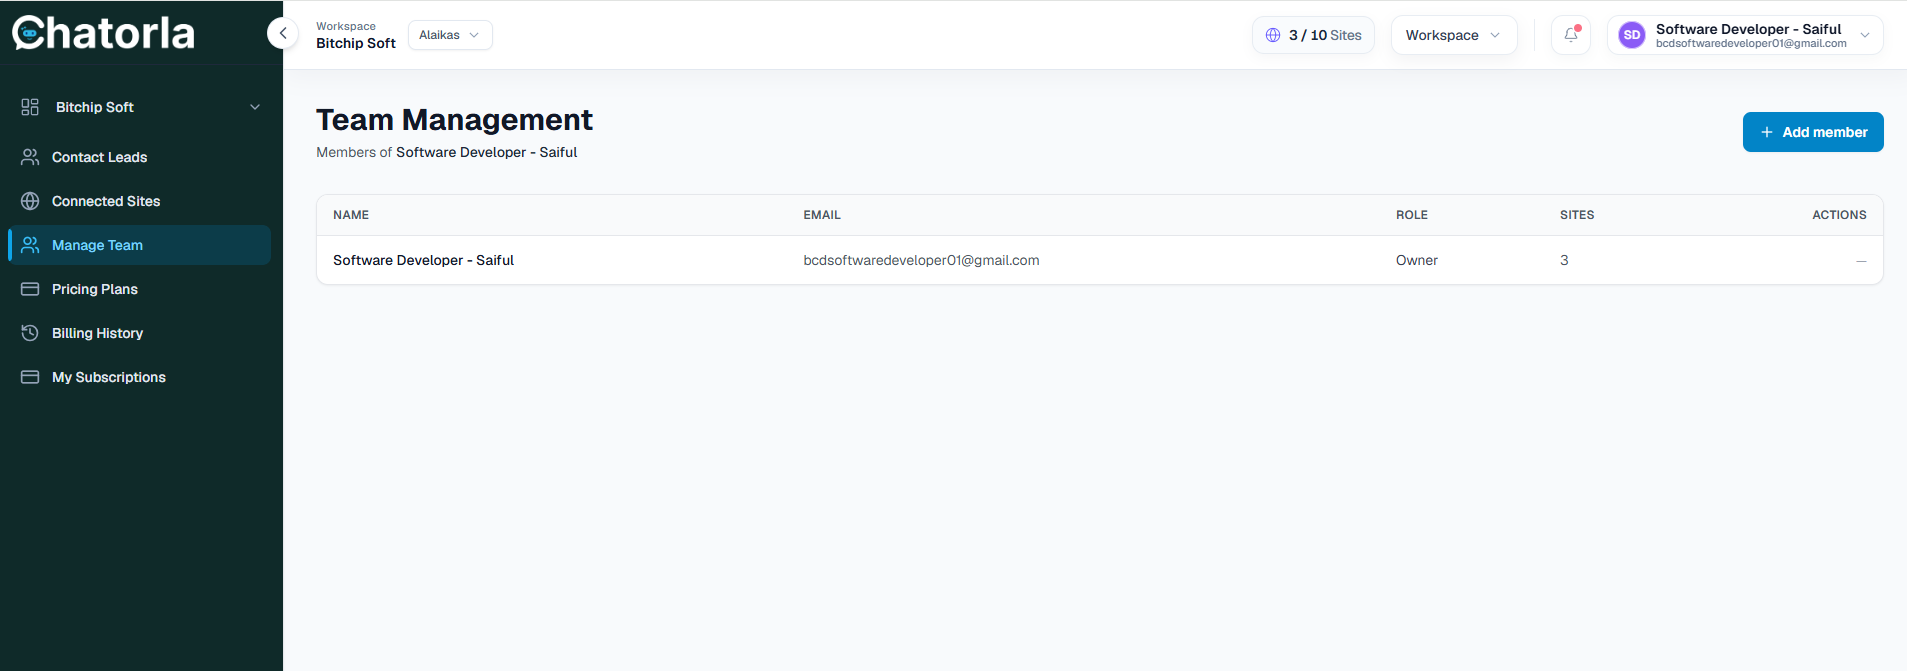
Team Management Overview
In this section, you can view your team members and manage who has access to the Chatorla workspace.
The team table may include:
- Team member name.
- Email address.
- Password.
- Role.
- Site URL.
How to Add a Team Member
- Go to Manage Team from the left sidebar.
- Click the Add Member button.
- Enter the team member's name, email address, and password.
- Choose the correct role or permission level.
- Send the invitation.
The invited member can then join the workspace and help manage chats, leads, and customer conversations.
Why Team Management Is Important
Team management helps you:
- Assign live chat responsibilities.
- Give access to support agents.
- Organize sales and support teams.
- Control user permissions.
- Improve customer response time.
- Manage conversations more efficiently.
This is useful for businesses with multiple agents, departments, or support teams working inside one Chatorla account.
Final Notes
You have now completed the main setup process for Chatorla, including connected sites, widget configuration, live agent transfer, reporting, integrations, contact leads, and team management.
These sections help you install the chat widget, manage conversations, collect leads, track performance, and organize your support team from one workspace.
Best Practices
- Keep Your Widget Active — Make sure your connected site status is active so visitors can see and use the chat widget.
- Test the Widget After Installation — After adding the widget code to your website, open your live site and confirm that the chat icon appears correctly.
- Update Your Welcome Message — Use a clear and friendly welcome message so visitors know they can ask questions or request help.
- Add Useful Trigger Phrases — For live agent transfer, include common phrases such as refund, billing, pricing, cancel plan, support, or talk to an agent.
- Review Contact Leads Regularly — Check both personal leads and organization leads so your team can follow up with potential customers on time.
- Monitor Reports — Use the reporting section to review chat volume, missed chats, response time, offline messages, and user satisfaction.
- Keep Your Team Updated — Add the right team members and make sure each person has the correct role for managing chats and leads.
Need More Help?
If you face any issues while setting up Chatorla, check the relevant dashboard section again and confirm that your website, widget script, integrations, and team settings are configured correctly.
For technical issues, contact the Chatorla support team with details such as:
- Your website URL.
- Workspace name.
- Connected site name.
- Screenshot of the issue.
- Browser or device information.
- Description of what is not working.
Conclusion
Chatorla helps businesses communicate with website visitors, answer customer questions, capture leads, and manage support conversations more efficiently. Once the widget is installed and configured properly, your team can use Chatorla to provide faster support, improve visitor engagement, and turn website conversations into valuable business opportunities.